
OBS Studio install करने के लिए obsproject.com के official download page से Windows Installer डाउनलोड करें, और अगर बाद में यह न खुले या अजीब व्यवहार करे, तो official docs में बताए checks आसान से शुरू करके करें: antivirus allowlist, drawing tablet drivers, Safe Mode, फिर Check File Integrity।
6 अक्टूबर 2026 तक उस page पर Windows का stable version 32.2.2 है (14 अगस्त को release हुआ), और page के मुताबिक Windows release, Windows 10 और 11 को support करता है। अगर install तो ठीक हुआ पर capture सिर्फ़ काला दिख रहा है, तो यह install नहीं बल्कि capture की problem है, इसलिए OBS black screen ठीक करने से शुरू करें।
यह गाइड सिर्फ़ PC (Windows) के लिए डाउनलोड, install का रास्ता चुनने, पहली बार खोलने की जांच, और install व launch के समय आने वाले errors को कवर करती है।
Symptoms और उनके लिए official docs वाले checks
| Symptom या हालत | Official docs में बताया गया check | कहां देखें |
|---|---|---|
| पता नहीं कि डाउनलोड कहां से करें | Download page के Windows हिस्से में Download Installer, Download via Bittorrent और Download Zip मिलते हैं, और Microsoft Store व Steam वाले badges भी official links हैं | obsproject.com/download |
| Update के तुरंत बाद व्यवहार बदल गया | Antivirus या security software, OBS को flag या block कर सकता है, इसलिए OBS folder को allowlist करें; कुछ products में हर update के बाद .exe हटाकर दोबारा जोड़नी पड़ती है | आपके antivirus या firewall की settings |
| Process चल रहा है पर window कभी नहीं दिखती | Wacom जैसे पुराने drawing tablet drivers की वजह से OBS खुल नहीं पाता, इसलिए driver update करें या हटा दें | Tablet driver की settings |
| Crash के बाद एक dialog आता है | OBS Studio Crash Detected नाम वाले dialog में Run in Safe Mode चुनें, ताकि third-party plugins, scripts और websockets बंद रहकर OBS खुले | Help > Restart in Safe Mode |
| Install की गई files खराब या बदली हुई लगती हैं | Integrity check पूरे installation को scan करके खराब या बदली हुई files फिर से डाउनलोड करता है, और यह सिर्फ़ latest version पर चलता है | Help > Check File Integrity |
| Program Files के बाहर ZIP खोला और UWP game capture ठीक से नहीं चल रहा | OBS Studio folder और उसके सभी subfolders पर ALL APPLICATION PACKAGES group को full control दें | Folder की security (permissions) settings |
छोटा सा फ़ैसला
डाउनलोड के लिए एक ही जगह काफ़ी है: obsproject.com। Official help portal के मुताबिक उस site से डाउनलोड करने पर आपको latest version मिलता है, जो इस्तेमाल के लिए सुरक्षित और malware से मुक्त है, OBS में कोई ads या साथ में bundled software नहीं है, और OBS के लिए पैसे मांगे जाएं तो वह scam है।
वहीं यह भी लिखा है कि OBS, GPLv2 open source है, कोई watermark या दूसरी पाबंदी नहीं, और commercial इस्तेमाल पर भी कोई limit नहीं, इसलिए पैसे देने या कहीं और installer ढूंढने की कोई वजह नहीं।
अगर install करना सिर्फ़ ज़रिया है और असली मकसद games को free में record करना है, तो पहले free में gameplay record कैसे करें के विकल्प देख लें, फिर भी OBS चाहिए तो यहां लौट आएं। Errors के लिए यह गाइड कोई एक वजह तय नहीं करती; नीचे की table और steps वही शर्तें फ़ॉलो करते हैं जो official documentation में दी गई हैं।
डाउनलोड से लेकर पहली बार सही से खुलने तक
- 1पक्का करें कि आप 64-bit Windows 10 या 11 पर हैंDownload page पर Windows के लिए सिर्फ़ x64 build है, और official system requirements में Windows 10 या 11 लिखा है। Start पर right click करें, Settings > System > About खोलें, और Windows specifications में version व Device specifications में 64-bit system type देखें। OBS 31.1 से Windows on Arm का support experimental है, और जून 2025 की official FAQ में hardware encoders, game capture और installer या updater को unsupported बताया गया है, इसलिए यह गाइड Arm PCs के लिए install steps नहीं देती।
- 2Official page से Installer डाउनलोड करेंपहले देखें कि address bar में obsproject.com/download लिखा है, फिर Windows हिस्से में Download Installer चुनें। 6 अक्टूबर 2026 तक file का नाम OBS-Studio-32.2.2-Windows-x64-Installer.exe है, और हर release के साथ version number बदलता है। अगला major version 33.0.0 beta में हो तब भी download page पर दिखने वाला stable version ही इस्तेमाल करें, इसलिए डाउनलोड से पहले वहां लिखा version पढ़ लें। दूसरी sites के installers, cracked copies और पैसे मांगने वाले pages official रास्ते नहीं हैं, उन्हें छोड़ दें।
- 3Installer के अलावा कोई official रास्ता चुनेंDownload page पर Microsoft Store और Steam के badges भी हैं, और official Windows Installation article, OBS Project के GitHub Releases page की तरफ़ भी इशारा करता है। Command line के लिए उसी article में winget install -e --id OBSProject.OBSStudio, choco install obs-studio, और scoop bucket add extras के बाद scoop install obs-studio दिए गए हैं, और लिखा है कि हर एक सीधे EXE installer डाउनलोड करके hash से verify करता है। Winget में -e query को बिल्कुल exact मिलाता है और --id उसे app ID तक सीमित करता है, और यह tool Windows 10 1809 या उसके बाद और Windows 11 पर चलता है। Installer के हर screen की details, disk space और administrator rights की ज़रूरत official रूप से documented नहीं हैं, इसलिए यह गाइड उनके बारे में दावा नहीं करती। Default folder भी installer screen से confirm नहीं है; official plugins guide सिर्फ़ Program Files के अंदर obs-studio folder का ज़िक्र करती है।
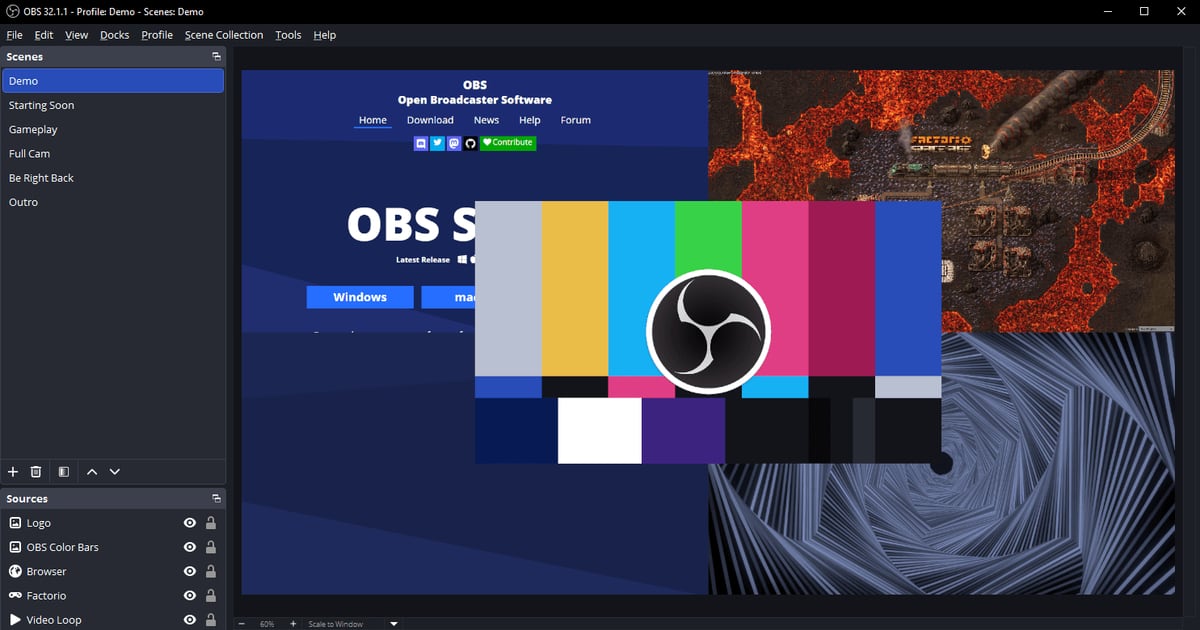
- 4देखें कि पहली बार खुलने पर क्या दिखना चाहिएपहली बार खोलने पर Auto-Configuration Wizard आता है, और इसे Tools > Auto-Configuration Wizard से दोबारा खोल सकते हैं। इसका पहला page Usage Information है, जहां आप Optimize just for recording, I will not be streaming; Optimize for streaming, recording is secondary; या I will only be using the virtual camera में से चुनते हैं। Wizard के अगले pages और आपकी पहली recording इस गाइड के दायरे से बाहर हैं। Official Quick Start Guide के मुताबिक शुरुआत एक खाली scene से होती है और audio mixer में पहले से Desktop Audio और Mic/Aux दिखते हैं। Window खुले और यह दिखे, तो install सफल है। Latest हैं या नहीं, यह Help > Check For Updates से देखें: नया build हो तो New update available और Update Now button दिखता है, और latest हों तो No updates available।
- 5Launch की दिक्कतें क्रम से सुलझाएंOfficial help portal और conflicts article नीचे वाले checks बताते हैं; क्रम इस गाइड का अपना है, आसान से शुरू करके। पहले पक्का करें कि OBS आपके antivirus और firewall में local और internet access की पूरी छूट के साथ allowlisted है; update के बाद OBS folder को exception में जोड़ें, और कुछ products में .exe हटाकर दोबारा जोड़ें। Process है पर window नहीं खुलती, तो drawing tablet driver update करें या हटा दें। Window खुलती है, तो Help > Restart in Safe Mode से third-party plugins और scripts बंद करें, और title bar में SAFE MODE देखें। कुछ भी न खुले, तो shortcut के Target field में obs64.exe के path के बाद --safe-mode जोड़ें। फिर Help > Check File Integrity चलाएं, जिसका title Confirm Integrity Check होता है; यह सिर्फ़ latest version पर चलता है, इसलिए पीछे हों तो पहले Help > Check For Updates करें। जांच के लिए Help > Log Files > Show Log Files, Help > Crash Reports > Show Crash Reports खोलें, या Help > Log Files > Upload Current Log File इस्तेमाल करें।
- 6अगर आपने ZIP या portable mode चुना हैZIP (OBS-Studio-32.2.2-Windows-x64.zip) को Program Files के बाहर खोलने पर, official Windows Installation article के मुताबिक OBS Studio folder और subfolders पर ALL APPLICATION PACKAGES group को full control देना होता है, वरना कुछ features, खासकर UWP apps का game capture, काम नहीं कर सकते। Portable mode के लिए official Running in Portable Mode article कहता है कि इसे किसी user folder में खोलें, Program Files में बिल्कुल नहीं, फिर OBS के root folder में portable_mode या portable_mode.txt नाम की खाली file बनाकर bin/64bit/obs64.exe चलाएं, या obs64.exe को --portable के साथ चलाएं। Scene collections में इस्तेमाल हुए image और media के paths portable नहीं बनते। Built-in updater को --disable-updater से बंद कर सकते हैं, और scheduled task में Start in location को obs64.exe वाले folder पर सेट करना होता है।
Install के बाद की checklist
- डाउनलोड का address obsproject.com था और किसी ने पैसे नहीं मांगे
- आपने 64-bit (x64) Windows 10 या 11 होना पक्का किया
- File नाम का version number, download page के stable version से मेल खाता है
- पहली बार खोलने पर wizard आया और window सामान्य रूप से खुली
- Help > Check For Updates से latest होना पक्का किया
- OBS folder आपके antivirus और firewall में allowlisted है
- आपको पता है कि कुछ गड़बड़ हो तो Help > Log Files > Show Log Files से logs खुलते हैं
अगर बस तुरंत recording शुरू करनी है
DOR एक free Windows app है जो supported games को detect करके पूरा match अपने-आप mp4 में record करता है, इसलिए पहले OBS जैसे scenes, sources या output settings बनाने की ज़रूरत नहीं। VALORANT उन games में है जिनमें kill highlight clips भी अपने-आप बनते हैं।
Game audio और microphone साथ में record होते हैं, और RTX series जैसे supported NVIDIA graphics card पर encoding का काम NVENC संभालता है।
बाद में app library में start और end सेट करके 16:9, 9:16 या 1:1 में trim कर सकते हैं और dor.gg link से share कर सकते हैं, या browser वाली DOR Studio गाइड खोलकर बिना कुछ install किए लंबाई बदलना, clips जोड़ना, text और background music लगाना कर सकते हैं। अगर आप OBS के साथ ही रहना चाहते हैं, तो install और launch errors के लिए ऊपर के checks फ़ॉलो करें।