To get straight to the point, you change your recording save location by clicking Browse next to the recording path in the Output tab of OBS settings, and it is most stable to point that path at an SSD with fast write speeds. If you also set up an automatic cleanup rule in advance for when storage fills up, you can almost completely prevent the situation where recording stops because the disk is full of recording files. Below, we will go through it one at a time in order: changing the path, setting an SSD, and managing storage.
The basic steps to change your recording save location
In OBS Studio, the folder where recording files are saved is set directly from the settings screen. If you leave it at the default, recordings usually pile up inside your Videos folder or user folder, but if you change this path to the drive you want, all future recordings will be saved to the new folder.
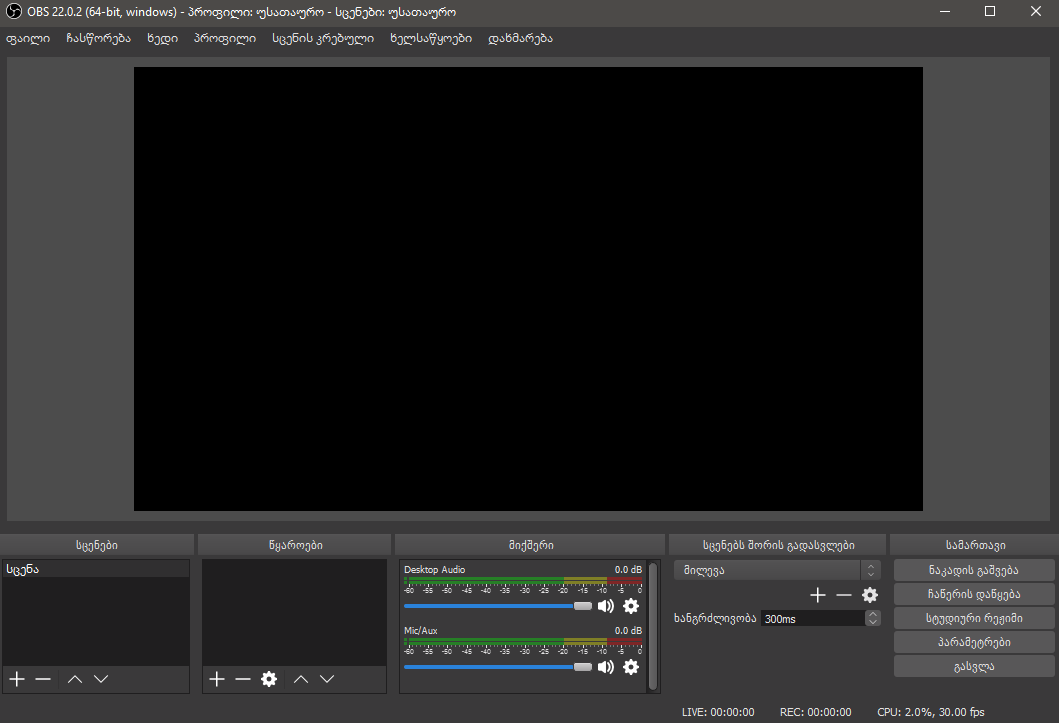
- Open Settings from the Controls area at the bottom right of the OBS main screen. You can also reach it through File in the top menu, then Settings.
- Select Output in the left-hand tabs.
- Find the Recording Path item in the Recording section. Your current save location is shown here.
- Click the Browse button and choose the folder where you want to save recording files.
- Click OK to save the settings, and from your next recording on, files will pile up in the new folder.
Setting an SSD as your recording drive
Recording files are written to disk at tens of megabytes per second. So the write speed of your save drive directly affects recording stability. Recording at high resolution to a slow HDD raises the chance of dropped frames or file corruption, so it is better to set your recording path on a fast storage device such as a SATA SSD or M.2 SSD.
- If you have a dedicated recording SSD, create a separate folder like Recordings inside that drive and set it as your path.
- Separating the drive that holds your OS and games from your recording drive keeps game loading and recording writes from clashing on the same disk.
- If you have an M.2 NVMe SSD, it has the most headroom for high-resolution, high-frame-rate recording, and a SATA SSD is plenty for most 1080p recording.
- If you use an external SSD, make sure the USB connection is stable, and keep in mind that if the connection drops, your recording stops along with it.
Splitting folders by game makes management easier
Saving recordings split by title makes finding clips later much faster. For example, you might gather Valorant recordings in a Valorant folder on the SSD, and League of Legends recordings in a LoL folder. OBS itself has no automatic per-title sorting, so you end up either changing the recording path to that folder each time you switch titles, or saving everything to one folder first and periodically moving files to organize them.
Automatic cleanup for when storage fills up
Depending on length and resolution, recording files can grow to hundreds of megabytes per minute. Even a few days of recording fills up an SSD quickly, so the key is to set up a rule in advance that regularly clears out old files. Instead of deleting by hand every time, you can automate it with operating system features and a simple script.
- Turning on Windows Storage Sense automatically empties temporary files and the Recycle Bin once the disk fills past a certain level, freeing up space.
- Keeping your recording folders consolidated in one place narrows the cleanup target to a single folder, making automation easier.
- Setting up a scheduled task to automatically delete files older than a certain period lets you, for example, automatically clean up recordings older than 30 days every week.
- Move any scenes you definitely want to keep to another folder or the cloud beforehand, so they are excluded from the automatic cleanup.
Using the replay buffer to keep only the moments you need
Recording everything continuously is a heavy storage burden, so using OBS's replay buffer lets you hold only the most recent stretch of time in memory and save just that section to a file with the save button when a good scene happens. This way, only clips actually worth keeping pile up on your disk, making storage management much easier. That said, with this method too, the saved clips still have to be managed by folder yourself.
DOR barely needs save-location management at all
Looking back over this whole process, setting the path, separating the SSD, splitting folders, and setting auto-cleanup rules all take quite a bit of effort. DOR approaches this part differently. DOR automatically organizes clips into its in-app library, so there is little need to manage save locations separately. Without worrying about which folder a clip was saved to or which title folder to put it in, the moment you record, it comes in neatly organized inside the library.
- Recorded clips are automatically organized into the in-app library, so you have less need to dig through folders in your file explorer.
- You can gather and browse clips in the library without sorting by title by hand.
- Unneeded clips can be cleaned up right from the library, so you do not need to build a separate deletion script.
- There is little initial setup burden like changing save paths or designing a folder structure, so you can focus on recording right away.
To sum up, if you record with OBS, changing the path to an SSD in the Output tab and setting an automatic storage cleanup rule is the foundation of stable operation. On the other hand, if you want to cut down on the effort you spend on save locations and storage management, it is worth also considering a low-maintenance approach like DOR, which automatically organizes clips into the library.

