Let's start with the bottom line: merging multiple game clips into one comes down to five steps. Gather and add the clips you want to merge in one place, arrange them in the order you want to show them, add transitions where cuts change, match the resolution and frame rate, then export at the same specs as the original. This article lays out the process of collecting short, scattered game clips like kill clips and great moments into a single highlight video, in an order that works regardless of your tool.
The key here is distinguishing "merging" from "editing." If you get greedy with subtitles, sound effects, and color grading, it can drag on forever, but if you set your only goal as naturally stitching multiple clips into a single video, 5 to 10 minutes is enough. Just follow the steps below.
Step 1. Gather and Add the Clips You Want to Merge in One Place
The first thing to do is gather all the clips you want to merge into one folder. If the kill scenes, ace rounds, and pentakills you saved separately during games are scattered across your desktop, recordings folder, and downloads folder, the work slows down twofold. Before editing, create a single "highlights" folder, move only the clips you'll use into it, then load all those clips onto your editing tool's timeline. Most tools let you drag in all the files at once or add several at the same time with an import button. At this point, it's fine if the order is a mess.
Step 2. Arrange the Clips in the Order You Want to Show Them
Once all your clips are loaded, set the order. For a highlight video, the "first 3 seconds" matter more than a beginning-middle-end structure. People decide whether to keep watching based on the intro, so it's to your advantage to put the flashiest scene right up front. Drag the clip blocks left and right on the timeline to rearrange them, and mix in plays with different vibes so similar scenes don't run back to back and get boring, building a rhythm. If there's filler (loading, waiting screens) attached to the front or back of a clip, trim both ends to clean it up at this stage. If you're not sure which scene to lead with for a given game, check out real auto-clip examples on the page for a game you play often, Valorant, League of Legends.
Step 3. Add Transitions Between Cuts
Once the order is set, it's time to add transitions where one clip meets the next. Transitions smoothly carry you from one scene to the next, reducing that jarring, choppy feel. The main types are as follows.
- Fade: The most reliable transition, where the screen fades out to black or white and back in. Works well at the start and end of a clip bundle, and at points where the mood shifts significantly.
- Dissolve: A transition where the previous clip gradually blurs as the next clip overlaps and emerges. Good for naturally connecting scenes with a similar tone.
- Wipe/Slide: A transition where the screen is pushed or wiped to one side as it changes. Gives a fast-paced kill compilation a sense of speed.
- Cut: Simply jumping straight to the next clip with no effect. In fact, it's the most commonly used, and for fast-tempo highlights, a cut is often the cleaner choice.
Be careful: adding too many transitions actually makes things distracting. Rather than cramming a flashy transition into every cut, applying a transition only at one or two points where the scene's character changes significantly and leaving the rest as clean cuts looks more professional. Keep transition lengths short too, around 0.3 to 0.5 seconds, so they don't disrupt the video's pace.
Step 4. Match Resolution and Frame Rate Before Exporting
This is the part that goes wrong most often when merging multiple clips. If clips have different resolutions (e.g., 1080p and 720p) or frame rates (e.g., 30fps and 60fps), the merged video may suddenly shrink, show black bars on the sides, or look smooth in some sections and choppy in others. The solution is to decide on a single baseline at the start. For game highlights, you'd typically set 1080p at 60fps (or 30fps) as the baseline, match your project settings to it, and unify all clips to those specs. Most tools will automatically conform clips of other specs once you set the project resolution and frame rate, and if just one clip has noticeably low quality, it's better to display it smaller or drop it.
For reference, if every clip has exactly the same resolution, frame rate, and codec, they can be stitched together quickly without re-encoding, but if even one differs, the tool re-encodes the whole thing and it takes longer. That's why "shooting with the same settings from the recording stage" is the secret to making merging as painless as possible.
Step 5. Export (Save)
Once you've sorted out transitions and specs, the last step is exporting. For format, choosing MP4 (H.264 codec) gives you the best compatibility and works fine wherever you upload it, YouTube, Instagram, or Discord. Leave the resolution and frame rate at the baseline you set earlier, and set quality to "high" or push the bitrate up a bit. When you hit export, it renders into a single file, which takes anywhere from a few seconds to a few minutes depending on the number of clips and your PC specs. Once it's done, play the whole thing through once to check that the transition points and audio aren't awkward, and touch up specific sections again if needed.
With DOR, It's Different Right From the Clip-Gathering Stage
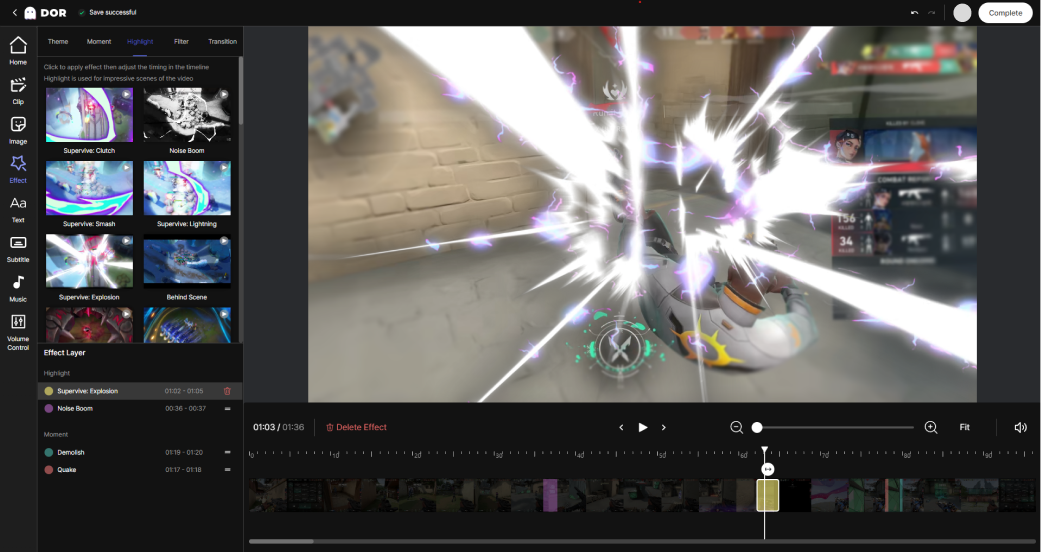
The most labor-intensive part of the process above isn't actually the editing, it's "Step 1, gathering the clips to merge." If you don't cut and save the good moments yourself as they happen, you won't have any clips to gather when you actually go to make a highlight reel. DOR solves this problem automatically. Leave a game running and it detects key moments like kills, aces, and pentakills on its own, cutting and collecting them as short clips, so the instant you close the game, Step 1 is already done. There's no need to hit a record button or hunt down great moments and cut them yourself.
And those collected clips can be stitched together right in DOR's browser editor. DOR lets you drag and drop the clips it collected and merge them into a single video in the browser editor. Without installing a separate program or firing up a heavy editing tool, you just drag the clips in, arrange the order, merge, and export right away. Other tools require a three-beat process of gathering clips yourself, launching a heavy editor, and merging, while DOR finishes in two beats: automatically collected clips merged by drag-and-drop in the browser, and the more often you make highlights, the wider this gap grows.
Wrapping Up
Merging multiple game clips ultimately comes down to five steps. Gather and add your clips in one place, arrange them in the order you want to show them, add transitions between cuts sparingly, match the resolution and frame rate to a baseline, then export as MP4 to finish a highlight reel. The keys are: fewer transitions, unified specs. If you also want to cut down on the effort of gathering clips, try DOR, which automatically collects great moments in-game and lets you stitch them together right in the browser editor. You can check out auto-clip examples first on the page for a game you play often, Valorant, League of Legends.

