
Bottom line, the key to recording games smoothly at 60fps is two things. First, locking capture frames (Common FPS) at 60. Second, handing the encoding work to a GPU hardware encoder so the game computation load and the recording computation load are distributed across different chips. Get just these two right and 1080p 60fps recording runs without stutter on most PCs. Below we lay out the OBS step-by-step numbers and recommended values by spec.
Why You Have to Lock Capture FPS at 60
The reason many people feel recording is stuttering isn't encoding, it's that frames are being dropped at the capture stage. If capture FPS is 30, the result is locked to 30fps even if the game runs at 144fps. Conversely, if you set capture FPS to 60, the encoder above it consistently receives and processes 60 frames every second. In other words, the starting point of 60fps recording isn't the encoder settings, it's the capture frame setting.
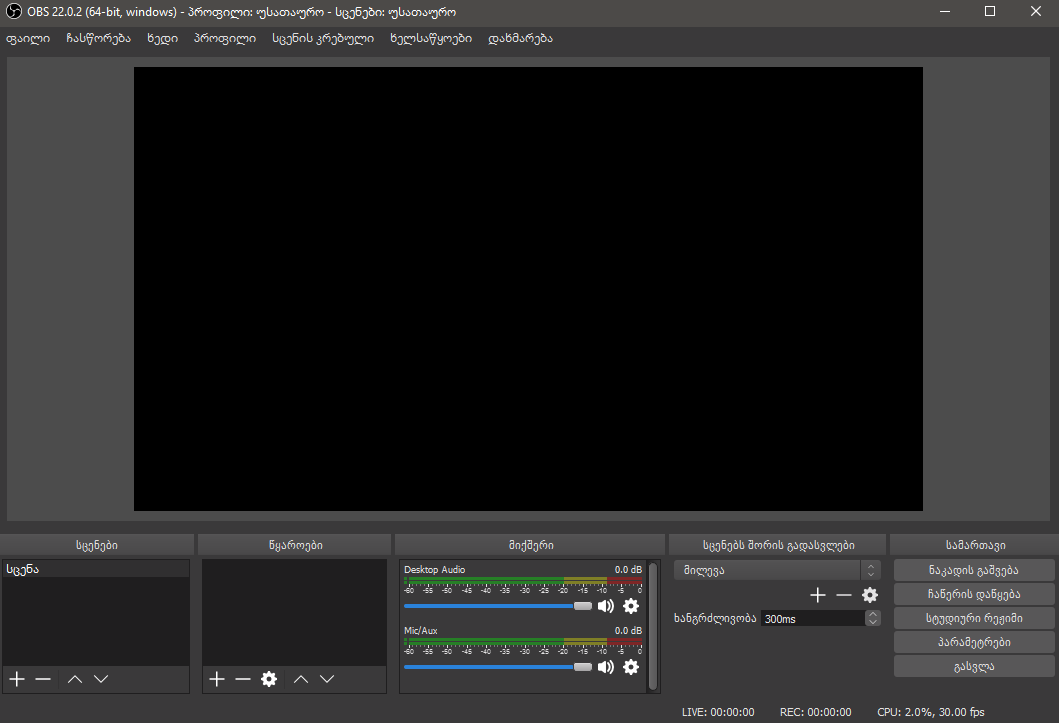
The Step-by-Step Order for Setting Up 60fps Recording in OBS
- Step 1 - Set Settings > Video > Common FPS Values to 60. Leaving it at 30 or auto means you'll never get 60fps.
- Step 2 - Set Settings > Video > Base Resolution and Output (Scaled) Resolution to the same 1920x1080 to eliminate downscale load.
- Step 3 - Change Settings > Output > Output Mode to Advanced and go to the Recording tab.
- Step 4 - Select a GPU hardware encoder for the encoder. NVIDIA is NVENC (HEVC/H.264), AMD is AMF, and Intel is QuickSync.
- Step 5 - Set Rate Control to CQP or CBR, and raise the bitrate to 12000 to 25000 kbps for 1080p 60fps. Unlike streaming, recording has no network constraint, so you can go higher.
- Step 6 - Specify a keyframe interval of 2 seconds. Leaving it at 0 (auto) can make seeking slow in an editor.
- Step 7 - Set the recording format to mkv. Even if OBS shuts off mid-recording, mkv survives to the last frame, and you can remux to mp4 afterward.
Rate Control: CQP vs CBR
For local recording, we recommend CQP over CBR (constant bitrate). CQP adjusts the bitrate variably based on screen complexity, giving better quality per file size. With NVENC, setting the CQP value to 18 to 20 yields a near-lossless result. If you're also streaming or want to keep file size predictable, use CBR at 15000 to 20000 kbps.
What 'Distributing Encoder Load' Means
Games use the GPU's rendering cores. But if you record with an x264 (CPU) encoder, the encoding load piles onto the CPU and your game frames drop. By contrast, hardware encoders like NVENC, AMF, and QuickSync use a separate dedicated encoding chip inside the GPU, so they barely interfere with the rendering cores. As a result, the game runs as the game and recording runs as recording. The setting you feel most in 60fps recording is exactly this encoder choice.
Recommended 60fps Recording Settings by Spec
The combination that can pull off 60fps comfortably differs by PC spec. Use the table below to choose your encoder and bitrate to match your GPU.
- Entry-level (GTX 1650 / RX 6500 class) - 1080p 60fps, NVENC or AMF, CBR 12000 kbps, 2-second keyframe. Locking the resolution at 1080p is the key to stability.
- Mid-range (RTX 3060 / RX 6600 class) - 1080p 60fps, NVENC HEVC, CQP 19 or CBR 18000 kbps, 2-second keyframe. 1440p 60fps is also no problem.
- High-end (RTX 4070 or higher / RX 7800 or higher) - 1440p to 4K 60fps, NVENC HEVC, CQP 18 or CBR 25000 to 40000 kbps, 2-second keyframe. For 4K you can raise the bitrate even higher.
- Laptop (mostly integrated graphics) - 1080p 60fps, QuickSync, CBR 10000 kbps. If it runs too hot, drop the resolution to 720p 60fps to prioritize securing the frame rate.
What Changes by Game
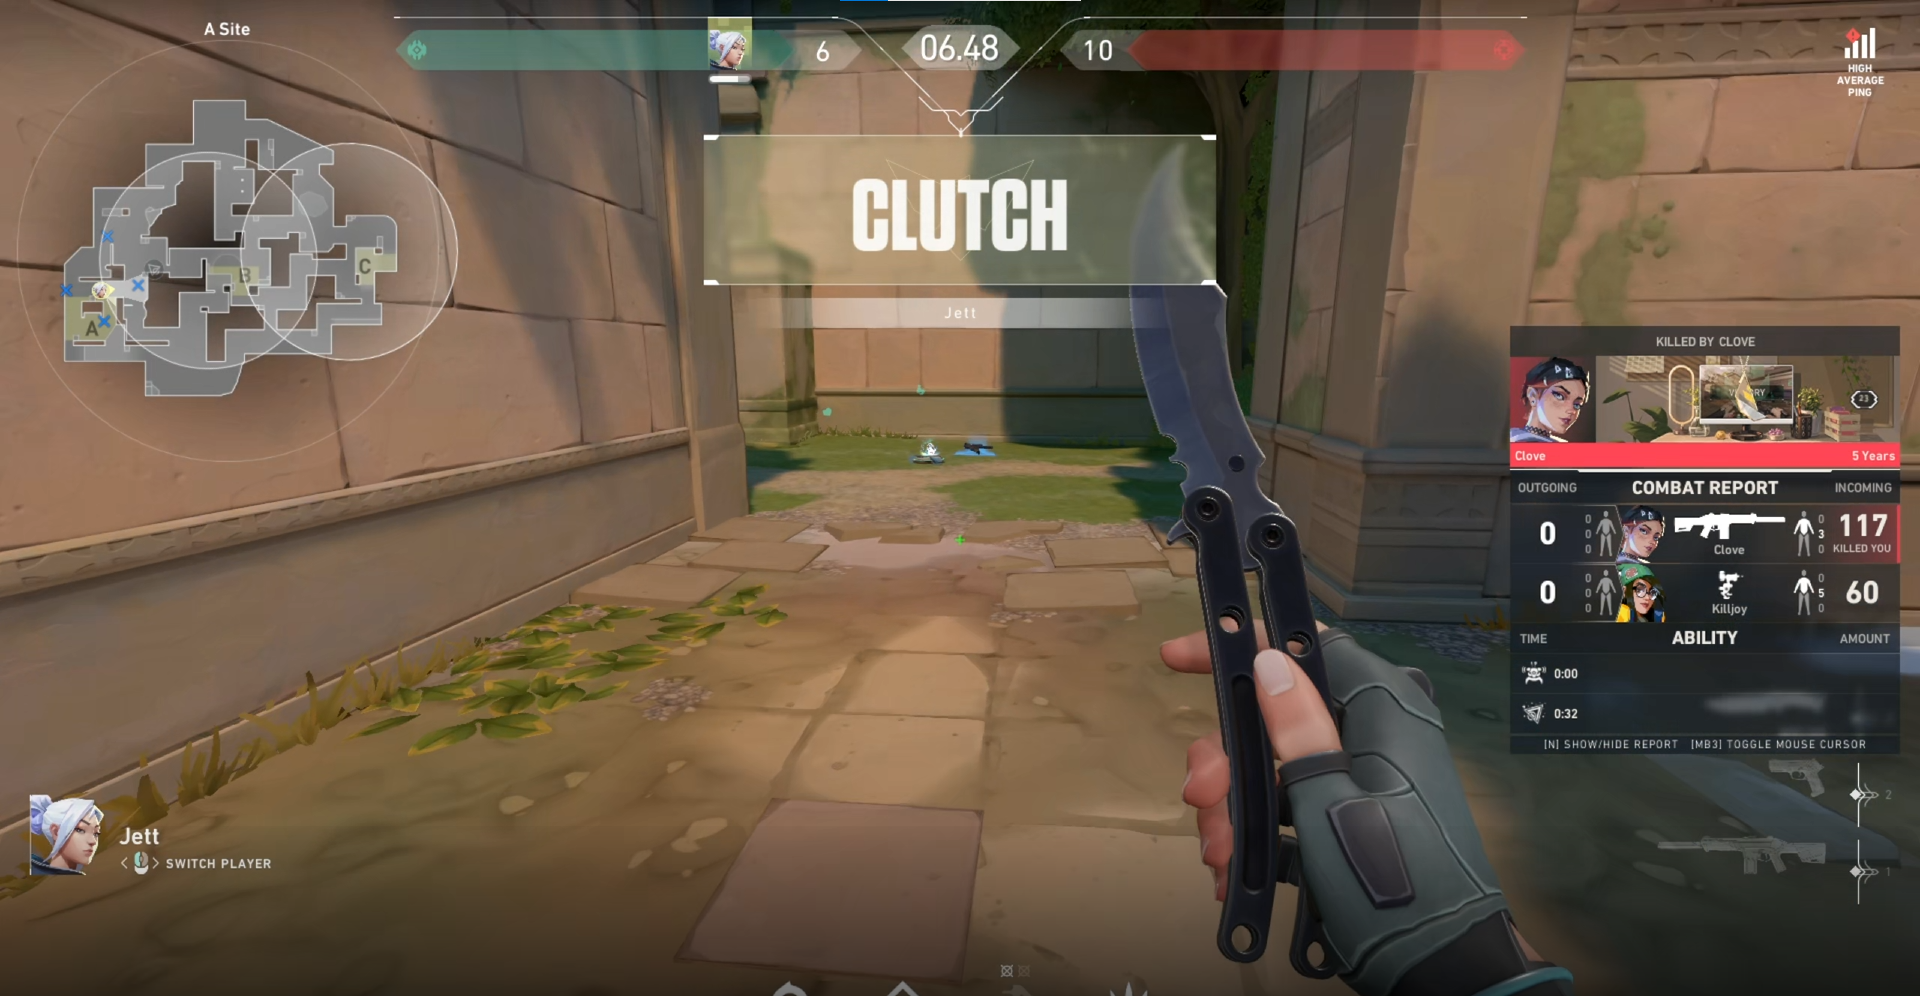
The faster the screen transitions, like in the FPS genre, the more 60fps and a sufficient bitrate matter. For example, in titles with lots of fast aim duels like Valorant or Counter-Strike, recording at 30fps makes the mouse movement in a clutch moment look smeared. Overwatch, with its frequent teamfights, likewise keeps ultimate effects and enemy position changes crisp at 60fps. For these games, it's safer to bump the bitrate one notch above the table's recommended value.
Recording With DOR Is Even Simpler
The steps so far are about setting up OBS yourself. DOR has capture frames optimized by default, so 60fps recording needs almost no extra setup. Even without you dialing in items like encoder load distribution, keyframes, and bitrate one by one, just hitting the record button with the game running saves a smooth 60fps result. The difference is that you can capture your gameplay footage right away instead of spending that time lost in settings screens.
What to Check After Recording
- Right-click the result file in your player and view its properties to confirm the frame rate was actually captured at 60fps.
- If the frame rate falls short of 60, re-check whether capture FPS is locked at 60 and whether the encoder is set to hardware.
- If the picture looks smeared, raise the bitrate or lower the CQP value toward 18. The lower the number, the better the quality.
