To emphasize the decisive moment of a game clip in DOR Studio, open the Moment tab in the effect panel and click an effect such as Snapshot!, Radiant Hit or Unstoppable!. A true freeze frame that halts the video was not found in DOR Studio as of October 6, 2026, so if you need one, use a tool whose documentation covers it. This guide separates pausing from emphasizing and helps you choose for a split-second play like a clutch clip. It makes no claims about views or retention, only what each effect looks like and the order to apply it.
Decide first: pause it or punch it up
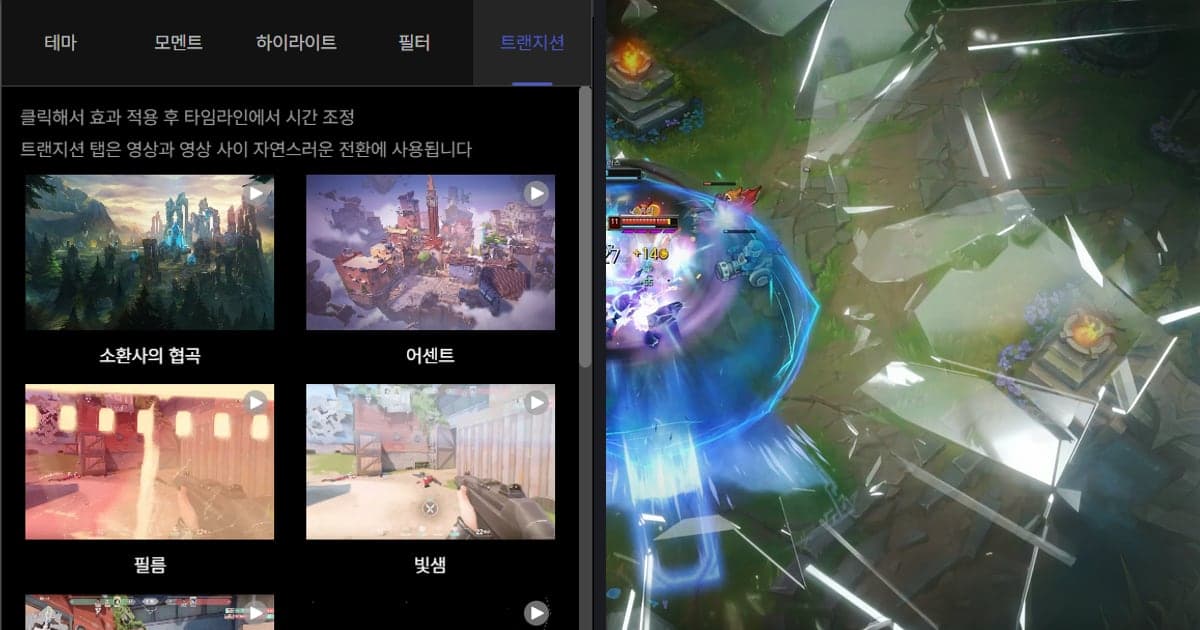
Pick a freeze tool if you want one frame held on screen, and DOR Studio's Moment effects if you only want the impact of the instant. DOR's browser clip editor opens with no install, and its effect panel has Theme, Moment, Highlight, Filter and Transition tabs. The on-screen note says Moment is used for instantaneous scene transitions, while Highlight is used for impressive scenes of the video. The two do not replace each other, so decide which one your clip needs before you touch anything.
How to add an emphasis effect in DOR Studio
- 1Pick the one moment to emphasize — Upload the clip to DOR Studio, play it, and settle on a single decisive point. The last kill that completes an ace or the instant before a narrow escape is enough. If the game has no automatic highlight clips, cut that stretch out of the full-match recording yourself and upload it. It is easier to set the video ratio for your target platform before adding any effect, because changing the ratio makes the effects reload to fit the new ratio, and some of them may end up looking different.
- 2Open the Moment tab — In the effect panel, open the Moment tab. The panel says to click to apply an effect and then adjust the timing in the timeline, so the flow is: click, then position it. Effect names and the lineup can change with updates, so trust the labels you see on screen.
- 3Click one effect — Snapshot! pairs a shutter overlay with a zoom, Radiant Hit adds a bright white flash overlay with a brightness adjustment, and Unstoppable! adds a zoom with blur. None of them stops the video, so click, play it back, and keep only the one that fits the mood.
- 4Set the timing in the timeline — After applying, adjust the timing in the timeline. Many Moment effects go in at a set length, so treat them as something to line up with the instant of the kill rather than a way to stretch a pause. Play from the start and check that the effect overlaps the moment instead of ending before the kill.
- 5Compare, then export — If you like, apply This Moment from the Highlight tab on the same spot and compare it with the Moment effect, keeping only one. Tidy any text or background music, then download an mp4 or share a link.
What each tool's official page confirms (as of October 6, 2026)
| Tool / menu | What the official source confirms | How it is used here |
|---|---|---|
| Premiere Pro (Adobe) | Adobe has an official support page with an entry on freezing frames (Freeze-related). Check the menu names and path on the page itself. | Hold one frame when a real pause is needed, after checking the official page |
| CapCut | The official tool page presents a Freeze feature and says the frozen section can be resized by dragging its edges. | Create the frozen section, then export |
| DOR Studio, Moment tab | Click Snapshot!, Radiant Hit, Unstoppable! and others, then adjust the timing in the timeline. No freeze-frame feature was found. | Emphasize the instant with shutter, zoom or brightness looks without stopping the video |
| DOR Studio, Highlight tab | This Moment sits in the Highlight tab, which is described as being for impressive scenes. | Apply it on the same spot and compare it with a Moment effect |
Pre-effect checklist
- I decided whether this scene needs a pause or just a hit of impact.
- I used one effect per clip, only on the single most decisive instant.
- I played it from start to finish and the effect lines up with the kill.
- I did not stack an effect with a brightness change on a scene that is already very bright.
- I checked effect and menu names against what the screen shows now, and checked freezing in that tool's own documentation.
Where DOR fits in
The DOR app detects supported games and records the full match as mp4, and for a game with automatic highlights such as Valorant it also saves kills as separate clips. Automatic highlight clips such as kills apply only to seven games (Valorant, League of Legends, PUBG, FC Online, Fortnite, Counter-Strike and Overwatch); other supported games get full-match recording only. For an effects workflow, that means less time hunting for the frame and more time choosing the effect. On an NVIDIA graphics card, recording uses NVENC hardware encoding, and game sound and microphone are captured together, so a callout made right at the emphasized moment is recorded along with it. DOR does not insert effects for you; you click them in Studio. When several emphasized clips need to become one video, continue with merging game clips.
Official sources checked
Checked as of October 6, 2026. For freezing frames in Premiere Pro, see Adobe's official support page; for CapCut, see its Freeze Frame tool page. We did not copy Adobe's menu names or steps here, so follow the page itself. Tab and effect names in DOR Studio follow the on-screen labels and may change with updates.