The short answer: a glitch transition belongs on the cut between two clips, so join the clips on one timeline first, then apply Glitch at the point where clip A ends and clip B begins. In DOR Studio you open the Effect menu, pick the Transition tab, click Glitch and adjust the timing in the timeline. Joining clips in general is covered in how to merge game clips, so this guide stays on the glitch transition alone. Everything below reflects what was checked on October 6, 2026.
Bottom line: stay with your editor and settle the order first
If you already edit in a desktop program, follow that program's official help page; if you want to try it in a browser with nothing to install, use the DOR Studio route. Either way, the transition happens where two scenes meet, so you need to know which scenes go in which order before you can choose the cut. Selecting highlights and ordering them is the earlier stage, written up in a game highlight editing workflow; come back to the steps here once that order is settled.
Five steps to a glitch transition in DOR Studio
- 1Add clip A and clip B with Add Video — Use Add Video to bring in the clip that comes before the transition and the one that comes after, in that order. A simple example is a VALORANT kill from one round as clip A and a kill from the next round as clip B, which gives you a natural change of situation between them. Play the result once to confirm the two videos are lined up the way you intended. Before adding any effect, it is easier to pick the Video Ratio that suits where you will post first; if you change it later, the effects reload to fit the new ratio, so some of them may look different.
- 2Find the boundary where the scene changes — A glitch transition marks a change of scene, so locate the point where A ends and B begins. Check that any important kill feed or key action in A has already played out, and that B does not open awkwardly. If a clip is too long or too short, tidy it first in the Clip menu so the boundary lands where you want it.
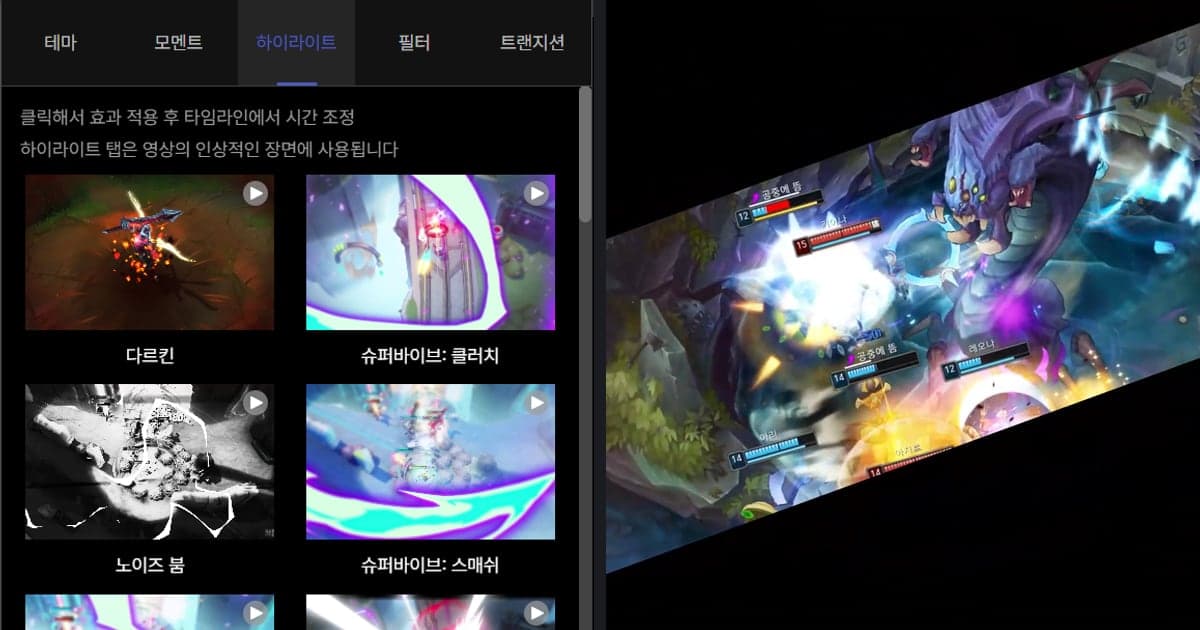
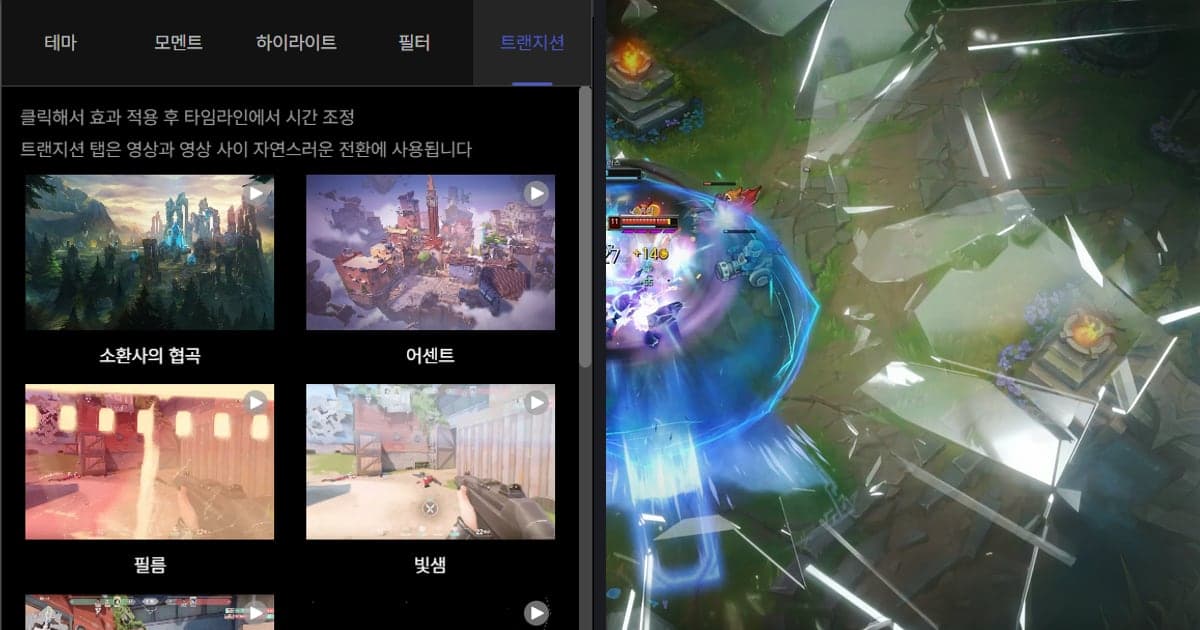
- 3Open Effect, choose Transition and click Glitch — Open Effect in the side menu and you will see the tabs Theme, Moment, Highlight, Filter and Transition. The Transition tab is described as being for natural transitions between videos, and it also holds Fade, Zoom Blur, Light Leak and VHS Intro. Click Glitch once and the effect is applied.
- 4Adjust the timing in the timeline — The on-screen guide reads 'Click to apply effect then adjust the timing in the timeline'. Move the applied Glitch so it lines up with the point where A and B meet, then play it back to see whether it feels early or late. The screen only describes timing, so this guide stops at positioning rather than saying anything about resizing.
- 5Check the result and export as mp4 or a link — The ratio is already set, so leave it alone here. Tidy text, background music and volume if you need them, play the whole video once to check the Glitch section, then download an mp4 or share a link.
Where to find a glitch transition in each tool (checked October 6, 2026)
| Tool | Route to a glitch transition | What to keep in mind |
|---|---|---|
| Premiere Pro (Adobe's help pages say Premiere) | Adobe's page on Premiere 26.0 changes (updated February 25, 2026) lists Glitch under Grunge & Distort in its video transitions table, with the earlier name FI: Glitch Impacts. | Adobe's separate 'Video transitions in Premiere' list (updated January 7, 2026) does not include Glitch. It varies by version, so look in Video Transitions in your own Effects panel. |
| CapCut | The help page shows a template route: search 'glitch transition' in Templates, choose Use Template, swap in your own clips, then export. | The page starts the CapCut Online steps with logging in to your account; the PC and mobile steps do not mention login. |
| DOR Studio (browser) | Open the Effect menu, go to the Transition tab and click Glitch, then adjust the timing in the timeline. | It runs in the browser with nothing to install. The effect is not added for you; you click to apply it. |
Checklist for choosing the cut
- Does the mood or situation really change at this cut, such as a new round or a jump to another scene?
- If the kill feed or a decisive action sits right before or after the cut, does the effect leave it visible when you play it back?
- Are you using Glitch only once or twice in the whole video rather than on every cut?
- Did you set the Video Ratio before adding effects? If you change it later, the effects reload to fit the new ratio, so some of them may look different.
- With background music and volume set, does the sound around the transition stay smooth?
With DOR, clips arrive automatically and the transition is yours
VALORANT is one of the seven games where DOR detects the game, records the full match to mp4 and makes kill and other highlight clips automatically, so the clips you want as A and B may already be cut for you. On an NVIDIA graphics card, NVENC hardware encoding is used by default, so you can leave recording the kill scenes for your transition to DOR while you play and do the editing later in one sitting. The glitch itself is not added automatically. You open the Transition tab in the browser studio, click it yourself and set the timing in the timeline. Trimming, joining several videos, text and background music are covered in the DOR browser clip editor article.
Official pages checked
Checked on October 6, 2026; versions and screens can change. Adobe's list of effects and transitions was used for the Glitch entry, and its Video transitions in Premiere list to confirm that Glitch is not in that list (updated January 7, 2026). CapCut details come from its glitch transition template guide.