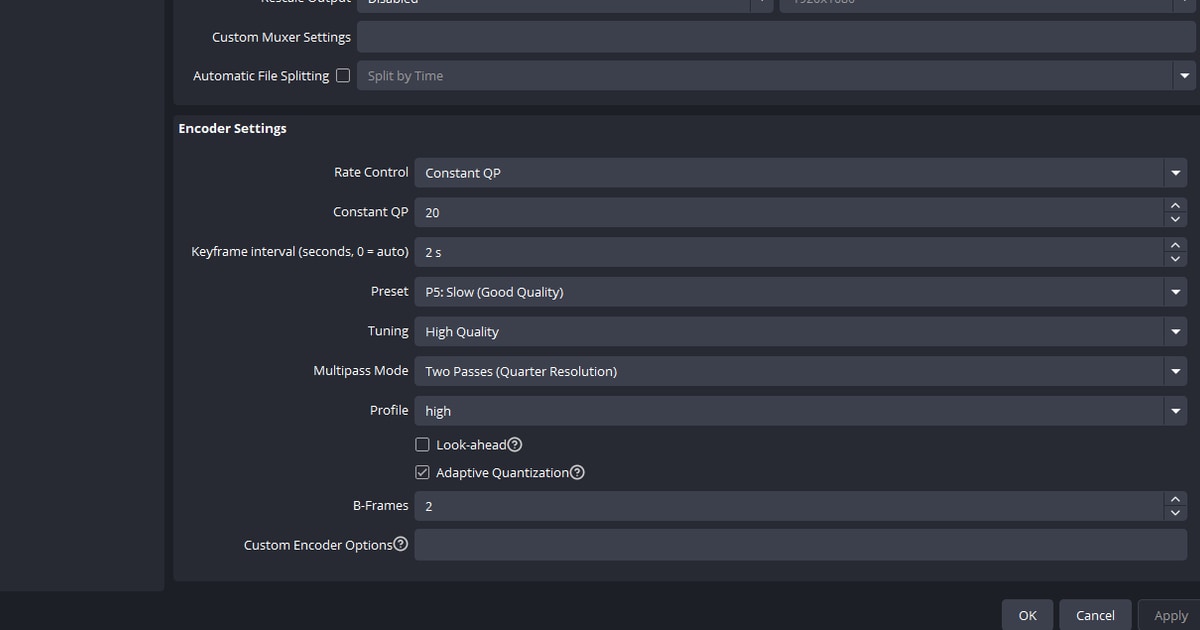

If you searched whether to turn Adaptive Quantization on or off in OBS, here is the short answer: for recording, leave it On to start and settle it with two recordings of your own, one On and one Off. No single answer circulates online because OBS's own official documents disagree with each other. The advanced recording settings guide lists Adaptive Quantization as On, a second official OBS guide covering advanced recording with multi-track audio lists Look-ahead and Psycho Visual as off, and NVIDIA's official OBS guide checks Psycho Visual Tuning for streaming. A naming change makes it worse. Since OBS 31.0 the NVENC checkbox formerly called Psycho-Visual Tuning is simply named Adaptive Quantization, so an older tutorial and a current OBS window look like they describe two different features when they do not. As of the 2026-09-08 check, the latest OBS Studio build is 32.2.2, which means a fresh install shows the Adaptive Quantization label. If you want the whole encoder page in order before you start flipping one checkbox, run through OBS NVENC recording settings first and the comparison below will click much faster.
So which way should you set it?
If recording is the goal, start with On, because that is what the OBS advanced recording settings guide specifies, and then decide whether to keep it by running two recordings on your own GPU. When official documents disagree, copying somebody else's conclusion leaves you with nothing you can verify. Freeze everything else, meaning Rate Control and Constant QP, the preset, the keyframe interval, B-frames, output resolution and frame rate, toggle only Adaptive Quantization between On and Off, and capture the same segment twice. The quality difference and the file-size difference show up immediately on your own hardware, which is the only place the question can actually be answered. If instead your recording stutters or OBS prints an encoding-overloaded warning, this checkbox is the wrong starting point entirely. The official OBS encoding performance troubleshooting document answers overload with lower output resolution, a lower frame rate, an in-game frame rate capped to your monitor refresh rate, lower in-game graphics settings, and simpler scenes with fewer sources, filters and browser sources, and it never mentions Adaptive Quantization at all. The only item NVIDIA's guide tells you to switch off when GPU utilization is high is Look-ahead. Clear the overload first with the OBS encoder overloaded fix, then come back to this comparison. The table below is simply which official document specifies what, as checked on 2026-09-08.
Which official document specifies what
| Official document / situation | Adaptive Quantization (formerly Psycho Visual) | Values the same document specifies alongside it |
|---|---|---|
| OBS advanced recording settings guide (recording baseline) | On | Constant QP 16–23 · Preset P5 · Tuning High Quality · Multipass Two Passes (Quarter) · Look-ahead Off · B-frames 2 |
| OBS advanced recording + multi-track audio guide | Off (listed off together with Look-ahead) | CQP · CRF 15–23 · Preset Quality · Profile High · Max B-frames 2 |
| NVIDIA official OBS guide (streaming baseline) | Checked | CBR · Preset P6 Slower · Profile High · Look-ahead checked · Max B-frames 4 |
| When GPU utilization is high (NVIDIA's own note) | No official instruction — the item named for switching off is Look-ahead | Look-ahead off · reduce B-frames from 4 to 2 |
| When the 'Encoding overloaded' message appears | Not mentioned by the official document | Lower output resolution · 60 to 30fps · cap in-game frame rate · lower in-game graphics settings · fewer scenes, filters and browser sources |
Check these before testing
- Check your OBS version — 31.0 and later label the box Adaptive Quantization, while earlier builds and NVIDIA's guide call it Psycho-Visual Tuning.
- Make sure the output mode is Advanced — choosing the encoder yourself is possible in the advanced view.
- Confirm your GPU runs NVENC — it works on GeForce 750 Ti or 900 series and newer, 6th generation NVENC is recommended, and current drivers are required.
- Prefer MKV as the container — it will not corrupt the whole file if the recording does not stop gracefully.
- Avoid the Ultra High Quality tuning for gameplay — the official document calls it live-action oriented, not recommended for gaming content, and says it significantly reduces throughput.
How to run the comparison yourself
- 1Pin down one test segmentPick the same replay or demo segment and keep the length identical. If you record a different match each time you cannot tell a quality difference from a scene difference.
- 2Lock every value except AQSet Rate Control and Constant QP, the preset, keyframe interval, B-frames, output resolution and frame rate once, then leave them alone. Change two things at once and the result tells you nothing.
- 3Record once with Adaptive Quantization OnCapture the chosen segment with the box checked and put the setting state in the file name. Note the rendering and encoding frame drops from the OBS stats window right after the capture.
- 4Uncheck it and record the same segment againChange only that checkbox. If you touch game graphics options or resolution in between, the comparison is void.
- 5Compare the same frame and lock in your conclusionPause both files on the same frame, compare them side by side, and read the file sizes and frame-drop numbers together. No visible difference means keep the documented baseline; a visible difference means adopt what your GPU showed. Re-check when you change game or resolution.
When comparing settings gets tedious
If the part that wears you down is relaunching OBS and staging the same moment again for every checkbox, you can hand the capture itself to DOR. DOR is a free Windows desktop app that uses NVIDIA NVENC hardware encoding by default, detects supported games automatically, records the full match, and saves kills and other highlights as separate clips. In a game like Valorant, where fights are short and decisive, those automatic clips double as ready-made comparison samples, and the in-app library makes it easy to pull the same moment back up after you change a setting. The browser clip editor opens with nothing to install, so you can trim the exact seconds you want and share a dor.gg link that a teammate opens straight from a mobile browser to judge the image quality for you. Game audio and microphone are recorded together, so the voice note you left explaining what you changed travels with the clip. If you plan to keep using OBS anyway, line up the rest of your values with OBS game recording settings and let DOR handle the capture and the sharing.