To cut mic noise in OBS, right-click your mic channel in the Audio Mixer, open Filters, and try Noise Suppression for steady hum such as a PC fan or Noise Gate for breathing and keyboard sounds that leak in while you are not talking, adding one filter at a time and listening after each. The three options that matter are Method (RNNoise is the default), Suppression Level (shown only when Method is Speex, and further left means stronger), and the Noise Gate's Close Threshold and Open Threshold. The official OBS knowledge base describes Noise Suppression as a filter for weak background or white noise and says it may not help much in a loud room. If your mic is not being picked up at all, that is a device problem rather than a filter problem, so start with the mic not recording fix. Menu names follow OBS Studio 32.2.2, checked on October 8, 2026.
Bottom line: filters polish small noise, they do not erase big noise
The short version is that Noise Suppression is meant for weak, constant sounds such as a PC fan or an air conditioner, and expecting it to remove loud noise usually leads to disappointment. If your voice starts to sound cracked or muffled after adding a filter, it is safer to remove a filter and listen again than to push the strength further. Filters attach only to the mic source you opened them on, so if you want to leave game audio alone and adjust only your voice, how to record game audio and mic on separate tracks is a useful companion.
How to add the filters to your mic channel
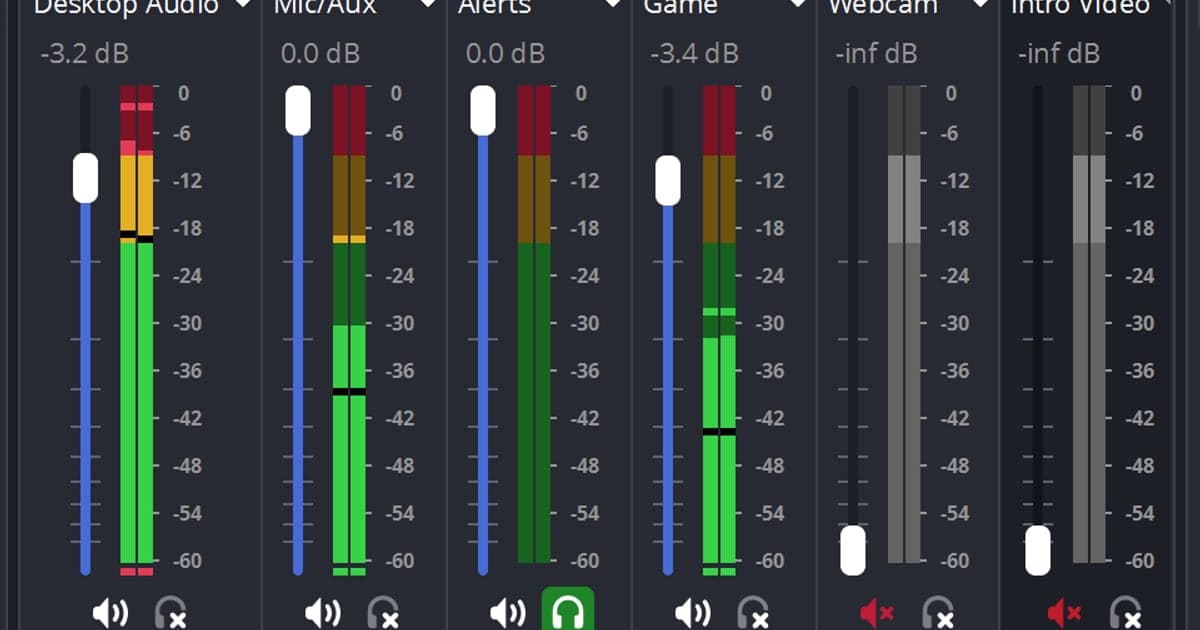
- 1Confirm the mic is being picked upUnder Settings > Audio > Global Audio Devices, check that your microphone is selected for Mic/Auxiliary Audio, then talk and watch the volume meter in the Audio Mixer. If the meter does not move, the problem sits before any filter.
- 2Open the Filters window from the mic channelRight-click the mic channel in the Audio Mixer. The menu includes Filters and Properties among other entries, and choosing Filters opens a window titled "Filters for '<name>'".
- 3Add Noise SuppressionClick the + button under the filter list and choose Noise Suppression, then confirm the name. Even if you searched for noise removal, the OBS menu calls it Noise Suppression.
- 4Check Method and Suppression LevelMethod defaults to RNNoise (good quality, more CPU usage) and can be switched to Speex (low CPU usage, low quality). The Suppression Level slider shows only for Speex, runs from -60 to 0 dB and defaults to -30 dB. Moving it left filters out more, at the risk of distorting your voice.
- 5Add Noise Gate only if neededIf sound still leaks in while you are silent, add Noise Gate from the same + button. The defaults, checked October 8, 2026, are Close Threshold -32.00 dB, Open Threshold -26.00 dB, Attack Time 25 ms, Hold Time 200 ms and Release Time 150 ms. The official guidance is to set the Close Threshold above the background noise and the Open Threshold slightly below your voice, and it gives no recommended numbers.
- 6Record a short test and listenSpeak normally for a few seconds, record, and play it back to judge whether the noise dropped and whether the start or end of your words gets clipped. The official docs give no advice on filter order, so listen after each filter you add and decide from what you hear.
Which filter to try first for each symptom
| Symptom | Filter to try first | What the official docs say |
|---|---|---|
| A PC fan or air conditioner hums constantly | Noise Suppression | A filter for weak background or white noise, and it can be effective against environmental noise such as fans. |
| Breathing or keyboard sounds leak in while you are silent | Noise Gate | A filter that cuts off background noise when you are not speaking. |
| The whole room is loud | Filters alone have limits | The docs note that Noise Suppression generally does not help much in a loud room. |
| Your voice sounds smeared or cracked | Move Suppression Level back to the right | With Speex, moving the slider left filters out more sound, and your voice and other sounds can be distorted. |
| You have an NVIDIA RTX graphics card and want the NVIDIA method | NVIDIA Audio Effects (a separate filter) | It appears in the filter list only when the SDK loads. Check the requirements on the NVIDIA page. |
Checklist after applying filters
- The Audio Mixer volume meter moves while you talk.
- You added one filter at a time and recorded a short test after each.
- You touched Suppression Level only with the Speex method, and your voice is not smeared.
- With Noise Gate on, the start and end of your words are not clipped.
- You removed any filter whose effect you could not hear and compared before deciding to keep it.
If you would rather start recording without building OBS-style scenes and sources
If your goal is simply to keep your voice in a gameplay video, you can also start with DOR, a free Windows app. DOR detects supported games automatically, records the full match as an mp4 and captures game sound and your microphone together, so you do not have to build OBS-style scenes, sources or filters first. The video side is encoded with NVENC hardware encoding by default when your PC has an NVIDIA graphics card. That does not mean DOR reduces mic noise, though, and the filter steps above are strictly about OBS. For VALORANT, kills and other highlights are also cut into automatic clips alongside the full match, so see the VALORANT guide, and for the voice-capture side continue with how to record game audio together with your mic. Afterwards, the app library's trim tool lets you set a start and end to keep only the part you need.