In OBS Studio, a webcam goes in as a Video Capture Device: click the + button under the Sources dock, pick it from the list, and check three things in Properties first, namely Device, Resolution/FPS Type, and Video Format. The direction for each is simple. Choose your webcam in Device, begin with Resolution/FPS Type on Device Default, and leave Video Format on Any until you have a reason to change it. If you want the webcam placed in a corner over gameplay or keyed against a green screen, continue with the facecam recording guide. This page follows the official knowledge base and the OBS Studio 32.2.2 English strings, checked on October 6, 2026, and it covers Windows PCs only.
The one thing to decide first
The official knowledge base says a resolution or FPS the device does not support makes the source show nothing. So leave resolution and FPS alone until you have a reason to set them, and if the picture goes blank, put them back to the default first. Do not assume a single cause. Work through OBS Properties, then Windows camera settings, then whether another app has the camera, one at a time. If building scenes and sources feels like too much in the first place, this overview of why OBS feels complicated may help.
Adding and tuning the webcam in order
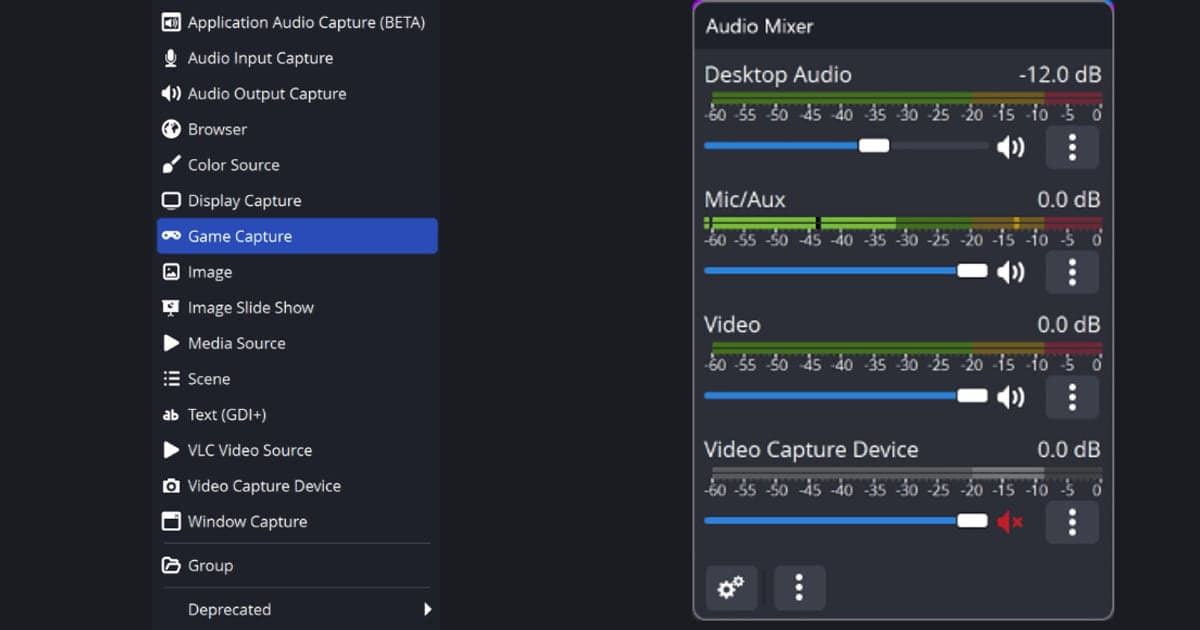
- 1Add Video Capture Device from the Sources dockClick the + button at the bottom of the Sources dock (Add Source) and pick Video Capture Device. It is the source for webcams, capture cards and similar video devices. On Windows the device driver has to support DirectShow output, and the official knowledge base says all major webcams and capture cards do. To remove a source later, use the - button in the same dock.
- 2Choose the device in PropertiesOpen the source's Properties and select your webcam in the Device drop-down. If your PC exposes more than one camera, check the name. The Activate and Deactivate button turns the device on or off, and Configure Video opens the driver's own settings tool when the webcam provides one.
- 3Check Resolution/FPS Type and Video FormatLeave Resolution/FPS Type on Device Default at first. If you switch to Custom, both Resolution and FPS must be values the device supports, otherwise nothing is shown. Video Format defaults to Any, and when a device offers several formats you can prefer one such as MJPEG or XRGB. The official pages give no figures for what each format changes, so treat it as an option that exists rather than a promised improvement.
- 4Look at Buffering, Flip Vertically and audioTry Buffering on Enable if choppiness bothers you and on Disable if delay does, and compare. Turn on Flip Vertically if the image is upside down. To use the webcam's built-in microphone, switch on Use custom audio device (Off by default), choose the Audio Device, and decide in Audio Output Mode whether to capture audio only or output it to the desktop audio.
- 5Set position and size in the previewSelect the webcam in the Sources dock and a red bounding box appears in the preview. Drag the box to move it and drag a corner or edge handle to resize. For exact values open Edit > Transform > Edit Transform (Ctrl+E); Reset Transform is Ctrl+R and Fit to screen is Ctrl+F. A source higher in the list is drawn on top, so keep the webcam above your game source.
- 6Crop the edgesIf unwanted edges show, hold Alt and drag a handle on the bounding box. The edge being cut turns green while you crop. To enter numbers instead, use Crop Left, Crop Right, Crop Top and Crop Bottom in the Edit Transform window.
What to check, symptom by symptom
| Situation | What to check | Source |
|---|---|---|
| The source is added but the picture is empty, or the wrong camera shows up | Open Properties and confirm your webcam is selected in the Device drop-down. If the device is switched off, press Activate. | OBS knowledge base |
| Nothing appears after you set the resolution or FPS yourself | Set Resolution/FPS Type back to Device Default. With Custom, a resolution or FPS the device does not support makes the source show nothing. | OBS knowledge base |
| The image is upside down | Turn on Flip Vertically. It is Off by default. | OBS knowledge base |
| Motion looks choppy, or the delay bothers you | Buffering defaults to Auto-Detect. Enable is described as easing choppy playback, and Disable as reducing delay. | OBS knowledge base |
| The webcam stays on while you look at other scenes | Deactivate when not showing (Off by default) turns the device off when it is not in the current scene to free resources. The picture may blink out briefly when it returns. | OBS knowledge base |
| You are unsure whether Windows blocks desktop apps from the camera | Following the Windows 11 Settings layout, go to Settings > Privacy & security > Camera and turn on Camera access and Let desktop apps access your camera. Desktop apps share one switch and cannot be toggled per app. | Microsoft Support |
| An error says another app is using the camera | That means another app or process holds the camera, so close it in Task Manager. Microsoft also suggests pausing antivirus or security software briefly to see whether it blocks the camera. | Microsoft Support |
| The device is missing from the list, or the driver is suspect | In Device Manager, choose Enable device if it is disabled, or try rolling back or uninstalling the driver and then Scan for hardware changes. For USB webcams, Microsoft also mentions the built-in USB Video Device driver. | Microsoft Support |
Final check before you record
- The source type is Video Capture Device and your webcam is selected in Device.
- If you changed Resolution/FPS Type, you confirmed the values are supported, or you put it back to Device Default.
- The image orientation is right; if it is upside down, Flip Vertically was checked.
- The webcam sits above the game source in the Sources list.
- After setting position, size and crop, you looked at the preview to make sure no edge is cut off by accident.
- If it still stays blank, you worked through Windows camera access, another app holding the camera, and Device Manager, in that order.
On days when you just want the game
On days when you do not need your face on screen, none of the webcam steps above apply. DOR is a free Windows app that detects supported games and records full matches to mp4 without you first building OBS-style scenes, sources or output settings. VALORANT is one of the supported games, and besides the full match it saves kills and rounds as automatic clips; game sound and your microphone are recorded together even with no webcam attached. When the PC has an NVIDIA graphics card, the encoding behind a game-only recording defaults to NVENC hardware encoding. DOR does not record or composite a webcam picture, so if you need your face on screen, use the OBS steps above. To read more about the microphone side, see recording game sound and mic together; afterwards you can trim the start and end in the app library, export in 16:9, 9:16 or 1:1, and share a dor.gg link.