The fastest way to cut game highlights in Premiere Pro is to play the recording once, press M at every kill to drop a marker, cut at each marker with Ctrl+K (Add Edit), and remove everything between the keepers with Edit > Ripple Delete. Because ripple delete closes the gaps for you, a 30-40 minute full match becomes a three-minute highlight draft in a single pass with no clip dragging. This guide uses only shortcuts confirmed in Adobe's official user guide (checked Sep 16, 2026, Windows default layout) and walks through import, markers, cuts, ripple delete, reordering and export. One naming note: as of that date Adobe lists the product simply as 'Premiere', but since people still search for Premiere Pro, that is the name used here. The editor-independent parts of the job (organizing footage, thumbnails, upload) are covered separately in the game highlight editing workflow.
The verdict: markers, cuts, ripple delete, and a way to skip the search
The minimum procedure is five lines. First, drag the recording onto the New Item icon in the Project panel to create a sequence that matches its resolution and frame rate. Second, press the spacebar to play and hit M at every kill to add a marker. Third, jump between markers with Shift+M and press Ctrl+K (Add Edit) just before and just after each kill. Fourth, select the unwanted clips between kills and run Edit > Ripple Delete (Shift+Delete) so the gaps close automatically. Fifth, press Ctrl+M and export as H.264 with the Match Source – Adaptive High Bitrate preset. The step that actually eats your time is the second one: finding the kills. If you play a supported game where kill and round clips are already saved as separate files, none of this setup is needed — combine and trim DOR's automatic clips in the browser editor and export, and open Premiere Pro only when you need more than that, such as automatic captions, precise color, keyframes or audio filters.
The six-step workflow from import to export
- 1Import the recording and build a matching sequence — Press Ctrl+I (File > Import) to bring in the full-match mp4, then drag that clip onto the New Item icon in the Project panel. Premiere Pro creates a sequence that inherits the file's resolution and frame rate, so there is nothing to configure. If game audio and mic are on separate tracks, check that the Linked Selection icon in the upper-left of the Timeline is on; that keeps video and audio moving together when you cut and delete later.
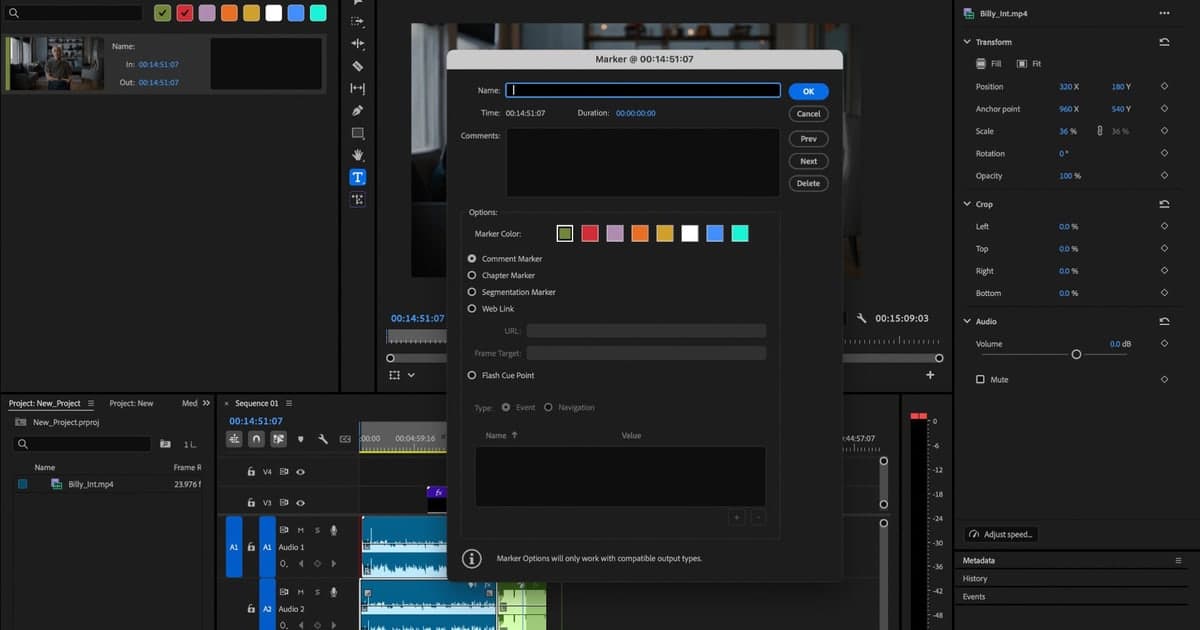
- 2Play through once and drop markers with M — Click into the Timeline panel (Shift+3) and press the spacebar to play. Every time a kill, ace or round win goes by, press M to add a marker. Do not stop to be precise; the exact cut points come in the next step, so watch straight through once. Markers added in the Source Monitor also show up on the timeline once the clip is placed, so you can do this pass there instead. When the list grows, open the Search panel (magnifier icon), choose Marker, search by name or color, and double-click a result to jump to it.
- 3Hop between markers and cut with Ctrl+K — Use Shift+M for the next marker and Ctrl+Shift+M for the previous one. At each marker, nudge the playhead to just before the kill with Left/Right (one frame) or Shift+Left/Right (five frames) and press Ctrl+K to add an edit there. If game audio and mic sit on several tracks, use Ctrl+Shift+K to cut every track at once. Repeat just after the kill and each marker turns into one clip to keep. If you prefer the mouse, press C for the Razor tool and click the clip; Shift-click cuts all tracks at the same spot.
- 4Remove the dead time with Ripple Delete — Press V to return to the Selection tool, click an unwanted clip between kills (Shift-click to select several) and run Edit > Ripple Delete. The Edit-menu default is Shift+Delete, and Alt+Backspace does the same when the Timeline panel is active. Unlike a plain Delete, the gap closes and the following clips pull forward. If you pressed Delete by mistake and a gap remains, click the gap to select it and press Delete again. One caution: whether sequence markers move during a ripple edit depends on Marker > Ripple Sequence Markers, and the Extract command (') removes sequence markers inside its range regardless of that setting.
- 5Reorder and tidy the cuts — To move your best kill to the front, hold Ctrl+Alt and drag the clip. A rearrange icon appears, and on release the clip is inserted at the new spot while only clips on that track shift. If a cut feels rough, press B for the Ripple Edit tool and drag the clip edge; the trim leaves no gap and the later clips follow. For frame-accurate work, select the Program or Timeline panel and press Shift+T to enter Trim mode, shuttle with J (back), K (stop) and L (forward), and set the point with I or O. Use Up and Down to jump between edit points and review each cut.
- 6Export as H.264 — Open File > Export > Media (Ctrl+M), pick a destination in the left column (Media File, YouTube and so on), and set the file name and location. For format choose H.264, which Adobe recommends for most online video, and for the preset choose Match Source – Adaptive High Bitrate, which keeps the sequence's frame size and frame rate; then click Export. If you have nothing to adjust, the Quick Export icon in the upper-right corner of the app lets you set only name, location and preset and export straight away.
Premiere Pro highlight-cutting shortcuts (Windows default layout, checked Sep 16, 2026)
| Task | Default shortcut | When to use it |
|---|---|---|
| Add Marker | M | Press it at every kill or round win while playing; works in the Source Monitor and the Timeline |
| Go to Next / Previous Marker | Shift+M / Ctrl+Shift+M | Hopping between markers to place your cuts |
| Mark In / Mark Out | I / O | Defining the start and end of a section in the Source Monitor |
| Add Edit / Add Edit to All Tracks | Ctrl+K / Ctrl+Shift+K | Cutting at the playhead; use Ctrl+Shift+K to cut game audio and mic tracks in one go |
| Ripple Delete | Shift+Delete (Edit menu) / Alt+Backspace (Timeline panel) | Removing an unwanted clip and pulling the following clips forward automatically |
| Insert / Overwrite | , / . | Placing the In/Out range from the Source Monitor at the playhead |
| Selection / Razor / Ripple Edit tool | V / C / B | Cutting a clip by clicking it (C) or trimming its end with no gap left behind (B) |
| Play / Pause | Spacebar | Constant use during the marker pass |
| Move one / five frames | Left, Right / Shift+Left, Right | Fine-tuning a cut point frame by frame |
| Go to Previous / Next Edit Point | Up / Down | Jumping between your cuts to review each one (works across all tracks) |
| Zoom In / Zoom Out | = / - | Zooming into a kill on the timeline (Timeline panel active) |
| Snap in Timeline | S | Toggling snapping to clip edges while dragging |
| Trim Edit (Trim mode) | Shift+T | Precise trimming of a cut with the J-K-L shuttle in the Program or Timeline panel |
| Export Media | Ctrl+M | Exporting the finished highlight as H.264 |
| Keyboard Shortcuts | Ctrl+Alt+K | Looking up any command not in this table |
| (Secondary) Ripple trim to playhead | Q / W | From a 2022 Adobe tutorial; not on the current default shortcut page, so search 'Ripple Trim' in Edit > Keyboard Shortcuts before relying on it |
Checklist before you export
- The sequence was created by dragging the recording onto New Item, so resolution and frame rate match the source
- The marker pass ran start to finish without stopping (precise positions are set during the cut step)
- With multiple tracks, cuts were made with Ctrl+Shift+K rather than Ctrl+K so every track is split
- Removals used Ripple Delete (Shift+Delete or Alt+Backspace), not Delete, so no gaps remain
- Any range removed with Extract (') was checked, since sequence markers inside it are gone
- Export format is H.264 and the preset is Match Source – Adaptive High Bitrate
- Any shortcut not in the table (Q/W and the like) was verified in Edit > Keyboard Shortcuts (Ctrl+Alt+K)
In a game with automatic clips, the find-and-cut steps disappear
Steps two to four above, finding each kill and cutting around it, are where the time goes. DOR is a free Windows app that detects supported games automatically, records the full match as mp4, and captures game audio and your mic together. In VALORANT, League of Legends, PUBG, FC Online, Fortnite, Counter-Strike and Overwatch it also saves highlights such as kills (and rounds in VALORANT) as automatic clips in its library, so there is no marker pass and no Ctrl+K. From there, use the library's trim tool to set a start and end, pick 16:9, 9:16 or 1:1, and share a link, or open DOR Studio (dor.gg/studio), the free browser editor with nothing to install, to combine several clips, adjust length and edit points, add text, background music and effect templates, and download an mp4 or share a link (clips must be at least three seconds and files 500MB or smaller). The boundary is clear too: unsupported games are not recorded, and anything beyond this guide's scope, such as automatic captions, precise color, keyframe animation, multitrack audio filters or plugins, still belongs to Premiere Pro.
Official sources checked
The menu and panel shortcuts in this guide (M, Shift+M, Ctrl+Shift+M, I/O, Ctrl+K, Ctrl+Shift+K, Shift+Delete, Alt+Backspace, , / ., = / -, S, Shift+T, Ctrl+M, Ctrl+Alt+K, Ctrl+I, Shift+3) are the Windows defaults from Adobe's official default keyboard shortcuts page (last updated Jan 7, 2026), checked on Sep 16, 2026. The V/C/B tool keys and spacebar playback come from Adobe's 'Edit video in Premiere' page (Aug 18, 2026), the one- and five-frame arrow moves from 'Navigate sequences in the Timeline', the Up/Down edit-point keys from 'Set In and Out points in the Source Monitor' (Apr 2, 2026), the Ripple Sequence Markers and Extract behavior from 'Perform ripple edits', Shift+T from 'Edit in Trim mode' (Aug 18, 2026), and the J-K-L shuttle from 'Perform J-K-L dynamic trimming in Trim mode' (Aug 18, 2026). Ripple Delete behavior and Shift-click multi-selection come from the remove clips from a sequence page, and the export steps, H.264 recommendation and Match Source – Adaptive High Bitrate preset from the export video page. Q/W ripple trimming was confirmed only in an Adobe tutorial dated Dec 28, 2022, which is why it sits in a secondary row. As of the same date the official product name is 'Premiere'.