The short answer: monitor HDR, Windows HDR, calibration, then Auto HDR or RTX HDR, not both
Getting HDR right on a Windows 11 gaming PC mostly comes down to doing things in the right order. First make sure the monitor is actually ready to accept an HDR signal.
Then turn HDR on in Windows, and run the free Windows HDR Calibration app once so Windows knows how dark and how bright your specific display can go. After that, games that have no HDR of their own get exactly one conversion feature: Windows Auto HDR or NVIDIA RTX HDR.
Games that do ship with HDR get neither; you switch on the in game HDR option and tune its brightness. Working through that sequence also makes it much easier to pin down what is wrong when you see a gray desktop or blown out skies.
- Monitor: check in the on screen menu that it switches to an HDR mode when it receives HDR, and set any HDR brightness option to the setting the maker used for its peak brightness spec. On the Samsung Odyssey OLED G6 (G60SF) that is Peak Brightness set to High. Turn off extra processing such as color enhancement or dynamic contrast.
- Windows: go to Settings > System > Display and turn on Use HDR. Windows logo key + Alt + B also toggles it. Use DisplayPort when you can.
- Calibration: install the free Windows HDR Calibration app from the Microsoft Store, work through the three patterns, and leave saturation near the default.
- Games without HDR: turn on either Auto HDR (DirectX 11 and 12 games) or RTX HDR (RTX 20 series and newer, DirectX 9 to 12 and Vulkan), only one. On AMD or Intel graphics, Auto HDR is your option.
- Washed out desktop: expected, not broken. Adjust the SDR content brightness slider first, and if it still looks off, toggle HDR on only for gaming.
Why HDR looks washed out on Windows 11: SDR content is being redrawn inside an HDR signal
When you flip on HDR, the desktop, the browser and YouTube can suddenly look flat, gray and faded. That happens because in HDR mode Windows sends the entire screen as an HDR signal and redraws everything made for SDR, including your desktop and most apps, inside it.
Microsoft's own support page explains that displays interpret HDR and SDR signals differently, that the result varies by manufacturer and model, and that you may need to adjust the relative brightness of SDR and HDR content.
So the same monitor can look dimmer or lower in contrast on the desktop than it did in SDR. It is not a sign of a faulty panel or fake HDR.
The first fix is the SDR content brightness slider in the HDR settings. Microsoft says the default or something close to it works for most people, and that pushing it higher raises overall contrast but can cost detail in dark areas.
Microsoft's developer documentation puts the nominal SDR reference white at 80 nits and notes that desktop HDR monitors are typically set around 200 nits.
If one app looks darker than others, lower the slider to even them out and raise brightness on the monitor itself; if an app ignores the slider, restart it.
The industry treats this as a real issue too: in May 2024 VESA added a test to DisplayHDR certification (CTS 1.2) that checks whether SDR app blacks in the OS HDR mode are no worse than in SDR mode.
In one forum question, a user found that raising the slider made games look better but made YouTube and everyday windows feel off. In that situation, our rule of thumb is to keep HDR off on the desktop and toggle it on with Windows logo key + Alt + B when you launch a game.
Step by step setup
- 1Check HDR on the monitorOpen the monitor's on screen menu, find the HDR related options, and disable post processing like color boost or dynamic contrast. Menu names vary by model, so check the HDR and brightness section of the manual. According to a measurement review, the Samsung G60SF switches into HDR mode when it receives an HDR signal, and per Samsung's footnote, Peak Brightness has to be on High to match the conditions Samsung used for its peak spec.
- 2Turn on HDR in WindowsGo to Settings > System > Display, pick the HDR monitor, and turn on Use HDR. External monitors need HDR10 support plus DisplayPort 1.4, HDMI 2.0 or newer, USB C or Thunderbolt. If you see color fringing around text over HDMI, switch to DisplayPort, or lower the refresh rate or resolution if HDMI is your only option.
- 3If HDR will not turn on, check dxdiagPress Windows logo key + R, type dxdiag, and choose Save All Information. In the saved file, AdvancedColorSupported means the driver and display support HDR10, and AdvancedColorEnabled means HDR is on right now.
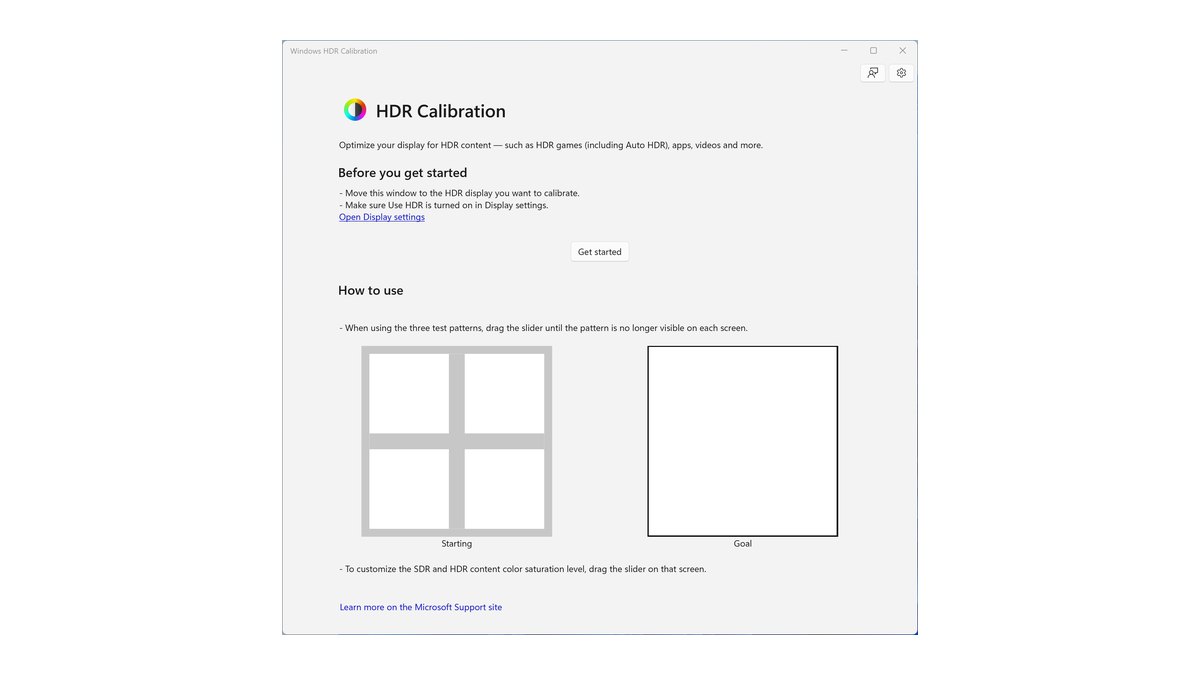
- 4Run the Windows HDR Calibration appInstall the free Windows HDR Calibration app from the Microsoft Store, move the window onto the HDR monitor, and run it full screen. Do it in the lighting you normally game in, then work through the three patterns.
- 5Set SDR content brightnessWith the desktop and a web page open, nudge SDR content brightness around its default. Stop where text is comfortable to read and gray backgrounds no longer look lifted.
- 6Turn on Auto HDR or RTX HDR, only oneFor games without HDR, expand Use HDR and switch on Auto HDR, or enable RTX HDR per game in the NVIDIA app's Graphics settings. If you go with RTX HDR, switch Windows Auto HDR off.
- 7Tune in game HDR brightnessIf the game has its own HDR option, turn Auto HDR and RTX HDR off and enable the game's HDR. A good principle is to match the game's peak brightness slider to the maximum brightness you set in the calibration app, which keeps highlights from clipping.
- 8Verify with the same sceneLoad the same spot in the same game and check that bright details like the sun or explosions and shadow details in dark corners are both visible. If one side is lost, go back to the calibration app or the game's brightness step.
Windows HDR Calibration app: three patterns and saturation
Windows HDR Calibration is Microsoft's free, official app in the Microsoft Store. It brings the HDR game calibration from Xbox to Windows, and its job is to tell Windows where your display's darkest and brightest usable levels really are.
Without that information, a game may send brightness the panel cannot reproduce, and those highlights and shadows can clip away.
The app builds a new color profile from minimum brightness, maximum brightness and saturation, and that profile is used for HDR games, including Auto HDR, and other HDR content. You need Windows 11, an HDR capable display with HDR turned on, and the app running full screen.
The saturation feature additionally needs at least NVIDIA GTX 10 series, AMD RX 400 series or Intel 11th gen integrated graphics class hardware, with a WDDM 2.7 or newer driver.
| Screen | What to do | Watch out for |
|---|---|---|
| Darkest visible detail | Drag the slider until the pattern is no longer visible | Calibrate in your usual gaming light |
| Brightest visible detail | Stop where the pattern blends into the background | Going too far clips bright detail |
| Maximum display brightness | Stop at the first point the pattern disappears | Set the monitor's HDR brightness option first |
| Color saturation (SDR and HDR content) | Move only slightly right of the default (left) | Too much makes skin and sky look unnatural |
Auto HDR vs RTX HDR: choose one based on your GPU and the game's graphics API
Both features take an SDR game that has no HDR of its own and make it look like HDR. Auto HDR is built into Windows 11 and expands the color and brightness range of DirectX 11 and DirectX 12 SDR games.
RTX HDR is a filter in the free NVIDIA app that adds HDR to DirectX 9 through 12 and Vulkan games on GeForce RTX 20 series and newer cards. The one rule that matters: do not run them together. NVIDIA's official requirements state that in game HDR and Windows Auto HDR must be disabled for RTX HDR.
Picking between them is simple. On an NVIDIA RTX card playing a DirectX 9 or Vulkan game, use RTX HDR. On AMD or Intel graphics, or when RTX HDR's conditions are not met, use Auto HDR.
If you have an RTX card and the game is DirectX 11 or 12, try each on the same scene and keep whichever looks better to you.
| Feature | Auto HDR | RTX HDR |
|---|---|---|
| Provided by | Built into Windows 11 | NVIDIA app (free) |
| Graphics card | Any PC where Windows HDR is on | GeForce RTX 20 series or newer, single GPU |
| Supported games | DirectX 11 and 12 SDR games | DirectX 9 to 12 and Vulkan games |
| Windows and driver | Windows 11 with HDR on | Windows 11 22H2 or later, HDR on, driver 565.90 or newer |
| Where to enable | Settings > System > Display > HDR > Auto HDR | NVIDIA app > Graphics > Program Settings, per game |
| Brightness control | Per game intensity in Xbox Game Bar | NVIDIA app overlay |
| Turn off alongside | Prefer the game's own HDR when it exists | Windows Auto HDR, in game HDR, Fast Sync |
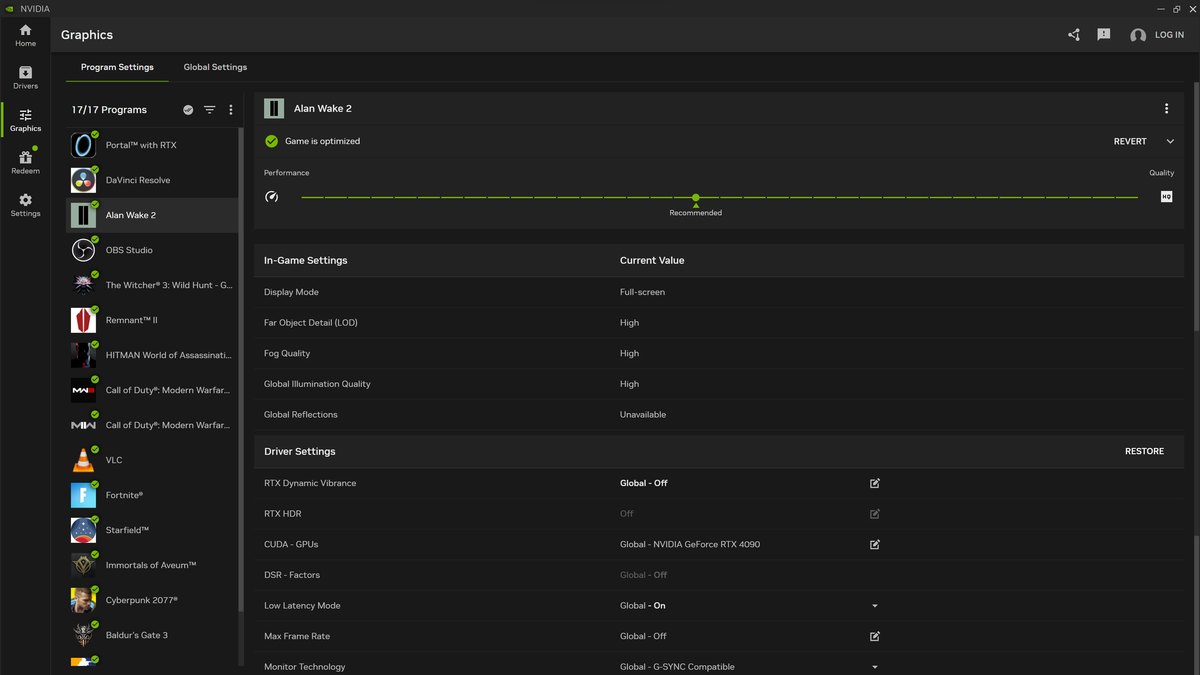
To enable RTX HDR, pick the game on the NVIDIA app's Graphics page and switch on the RTX HDR row under driver settings, then fine tune brightness from the NVIDIA app overlay in game.
It supports multiple monitors, but it is unavailable in NVIDIA Surround or duplicate mode, and on an extended HDR plus SDR setup it applies only to games launched on the HDR monitor.
Peak brightness follows the display's EDID value up to 2,000 nits, and falls back to 1,500 nits if the EDID does not report one. Because it uses a bit more GPU work, check your fps before and after if the game is already near your frame target. For the rest of your driver side settings, such as low latency mode and vertical sync, see our NVIDIA Control Panel settings for gaming.
Recommended settings by game situation
| Situation | Windows HDR | Auto HDR | RTX HDR | In game HDR |
|---|---|---|---|---|
| Game has an HDR option | On | Off | Off | On, tune brightness |
| No HDR option, DirectX 11 or 12, RTX 20 or newer | On | Pick one | Pick one | Not applicable |
| No HDR option, DirectX 9 or Vulkan, RTX 20 or newer | On | Not supported | On | Not applicable |
| No HDR option, AMD or Intel graphics | On | On (DirectX 11 and 12) | Not supported | Not applicable |
| Competitive FPS where you dislike the shift, or OpenGL games | Off is fine | Off | Off | Not applicable |
When a game has native HDR, that is usually the most natural looking choice. When Microsoft first introduced Auto HDR, it described native HDR as the best quality and Auto HDR as the option for games that lack it.
Set the game's peak or white brightness sliders close to the maximum you chose in the calibration app, and follow the game's own calibration screen if it has one. Competitive shooters are a different case.
If the shift in brightness and contrast feels unfamiliar when you are tracking targets, it is perfectly reasonable to keep HDR off and play on the SDR setup you know. For competitive monitor tuning, see our VALORANT monitor settings.
How to read OLED HDR labels: True Black 500 is not the peak brightness
The HDR number on most monitor boxes is a VESA DisplayHDR certification tier. LCDs use DisplayHDR 400, 500, 600, 1000 and 1400. Self emissive panels like OLED use DisplayHDR True Black 400, 500, 600, 1000 and 1400, a family VESA introduced in 2019, and every tier requires HDR10 support.
True Black 500 certifies at least 500 nits on a small 8 percent patch, at least 300 nits briefly across the full screen, and black levels of 0.0005 nits or lower.
The 1,000 nit or higher peak figures that makers advertise come with their own footnoted test conditions, such as 1.5 or 3 percent APL, which is why they do not match the tier number.
VESA also warns that lookalike labels such as HDR 400 written without the DisplayHDR name likely belong to products that did not meet certification, so check the model in VESA's certified list.
| Tier | Min brightness, 8% patch | Min full screen flash |
|---|---|---|
| True Black 400 | 400 nits | 250 nits |
| True Black 500 | 500 nits | 300 nits |
| True Black 600 | 600 nits | 350 nits |
| True Black 1000 | 1,000 nits | 500 nits |
| True Black 1400 | 1,400 nits | 700 nits |
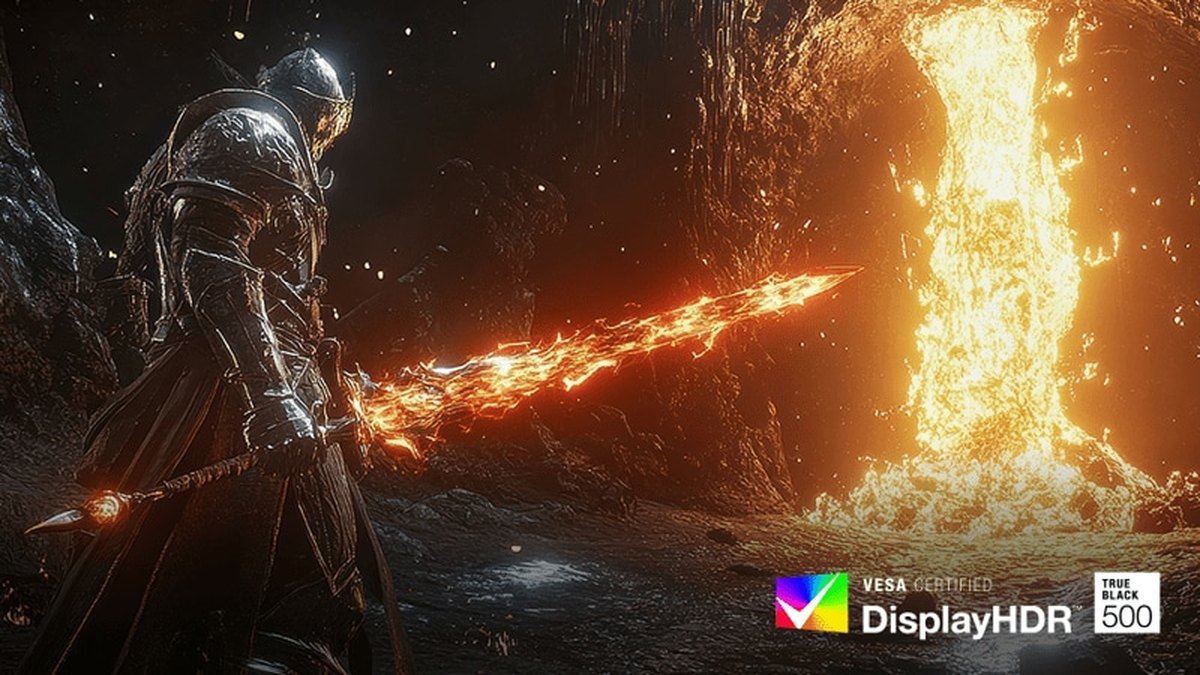
The LG UltraGear 27GX790B is certified VESA DisplayHDR True Black 500, while LG lists its typical peak brightness as 1,500 nits at 1.5 percent APL. Same tier, much bigger peak number, because the tier is tested on an 8 percent patch while LG's peak figure uses a 1.5 percent APL condition.
It is a 27 inch dual mode OLED that switches between QHD at 540Hz and HD at 720Hz. A measurement review praises its contrast and bright highlights, and flag that it renders HDR brighter than the source as an accuracy drawback.
Running the calibration app once means games send brightness that fits what this panel can actually show.
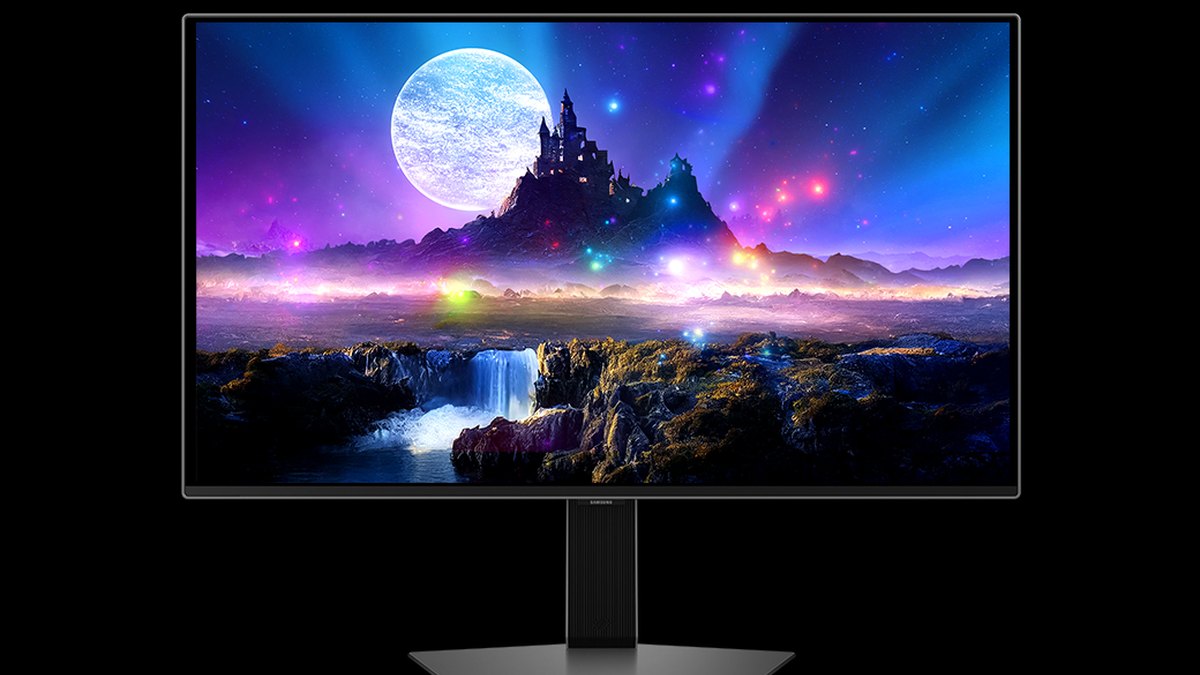
The Samsung Odyssey OLED G6 (G60SF) is a 27 inch QHD 500Hz QD-OLED certified DisplayHDR True Black 500 (based on 10 percent average picture level), with typical peak brightness of 1,000 nits. Samsung notes that figure was measured with HDR on and Peak Brightness set to High, at 3 percent APL.
One measurement review found it switches into HDR mode automatically on an HDR signal, and that its HDR tone tracking was accurate with Peak Brightness on High. It is a good example of a single monitor menu option changing your HDR result.
Some models, such as the ASUS ROG Swift OLED PG259QWS Ace, list only HDR10 and a 1,700 nit peak on the official spec sheet without a VESA tier, so read the certification tier and the peak number separately.
To choose a monitor, start with our gaming monitor buying guide and best gaming monitors, compare panel types in OLED 720Hz vs TN 600Hz, and protect an OLED with OLED burn in prevention settings.
Prices (as of November 10, 2026)
| Product | Launch price | Street price range |
|---|---|---|
| LG UltraGear 27GX790B | $999.99 | About $680 to $800 |
| Samsung Odyssey OLED G6 (G60SF) | $999.99 list | About $550 to $750 |
| ASUS ROG Swift OLED PG259QWS Ace | $1,099 | Check with the retailer |
These are US prices for the three monitors used as HDR label examples above. Street prices come from recent retailer listings and sales, so they move with stock and promotions; coupon and card offers are not included. Check the retailer price and the HDR certification on the listing before you buy.
8 common mistakes
- Stacking Auto HDR, RTX HDR and in game HDR. RTX HDR's requirements call for the other two to be off.
- Calibrating while the monitor's HDR brightness option is set low. Set the monitor first, then run the app.
- Leaving Night light on with HDR. Microsoft notes colors can look oversaturated or red on an HDR display.
- Using an HDMI link without enough bandwidth. If text shows color fringing, switch to DisplayPort or lower refresh rate or resolution.
- Assuming a laptop is broken when HDR turns off on battery. That is the default power behavior, and you can allow HDR on battery in Settings at the cost of battery life.
- Missing the Dolby Vision brightness cap. Some monitors limit peak brightness in Dolby Vision mode, so turning off Use Dolby Vision mode can make HDR brighter, in exchange for color accuracy.
- Cranking saturation in the calibration app. Microsoft itself warns that too much looks unnatural.
- Only fiddling with settings after a driver update breaks HDR or RTX HDR. One user report described a black screen with RTX HDR on a specific driver that was fixed in the next release, so compare against the previous driver.
How to confirm HDR is working
Under Settings > System > Display > HDR, look at the display capabilities list and confirm that HDR video streaming and HDR games and apps show as Supported.
If HDR certification under Advanced display says Not found, the monitor either has no certification or the maker did not publish that information.
For a deeper check, open your saved dxdiag file and confirm the Advanced Color values, plus HDR Supported, BT2020RGB or BT2020YCC, and Eotf2084Supported in the monitor capabilities. On the monitor side, look for an HDR indicator in the on screen info page.
Finally, load the same scene in the same game: if bright highlights and dark corner detail are both intact, you are done. If motion blur bothers you once HDR is dialed in, move on to monitor overdrive settings.
Record your gameplay before and after changing HDR
Whether an HDR change actually helped your play is easier to judge from footage than from memory. Record one match on the same map before and after you change HDR, and you can go back and compare where your reactions and aim felt more comfortable.
DOR is a free Windows game recorder that detects supported games when you launch them, records the full match automatically, and collects the recordings in My Clips inside the app.
You do not have to remember to hit record every time you tweak a setting, so before and after footage builds up on its own. Judge color and brightness on the monitor itself, and use the recordings to review your fights and reactions.