
The short answer: check DPI in the maker's app, then lock 800
The most reliable way to see your mouse DPI is the software from the company that made it. In Logitech G HUB, the underlined number on the Sensitivity (DPI) screen is the DPI you are using right now. In Razer Synapse, select the mouse and the sensitivity stages are listed.
Once you know the number, most players should settle on 800 DPI and adjust in game sensitivity around it. In public pro gear lists checked on November 10, 2026, 800 DPI was the most common setting among VALORANT, CS2 and PUBG pros, so 800 also makes it easy to borrow anyone's settings.
- Have the software: read the underlined value in G HUB, or the sensitivity stages in Synapse.
- No software installed: on a G305, press the DPI button behind the wheel and read the light color (white means 800). On a Razer Viper V4 Pro or DeathAdder V4 Pro, remember the factory default is 1600.
- No label, no app: measure it roughly with a ruler and Paint, then round to the nearest standard step (400, 800, 1600, 3200).
- Changed DPI: fix your game sensitivity with new sens = old sens × old DPI ÷ new DPI, and turn off Enhance pointer precision in Windows.
What DPI means and why you need it before any sensitivity guide
DPI, which SteelSeries calls CPI, is the number of movement counts a mouse sensor reports for every inch (2.54 cm) you move it. At 400 DPI the mouse reports 400 counts per inch; at 800 it reports 800. Same hand movement, double the DPI, and your crosshair travels roughly twice as far.
That is why in game sensitivity only makes sense next to a DPI value. Multiply the two and you get eDPI: eDPI = DPI × in game sensitivity. Two players with completely different numbers can have the same eDPI and the same feel.
Most sensitivity guides quote a value "at 800 DPI". If you do not know your own DPI, copying those numbers gives you a completely different feel. Before you read PUBG sensitivity at 800 DPI or PUBG pro sensitivity, confirm your DPI first.
Also, a higher maximum DPI does not mean a more accurate mouse. Measurement reviews test how closely the set DPI matches real movement as a separate metric, which tells you the printed value and the actual value can drift a little, and the max DPI on the box has no direct link to accuracy.
Check it in the software: Logitech G HUB and Razer Synapse
Logitech G HUB: the underlined number is your current DPI
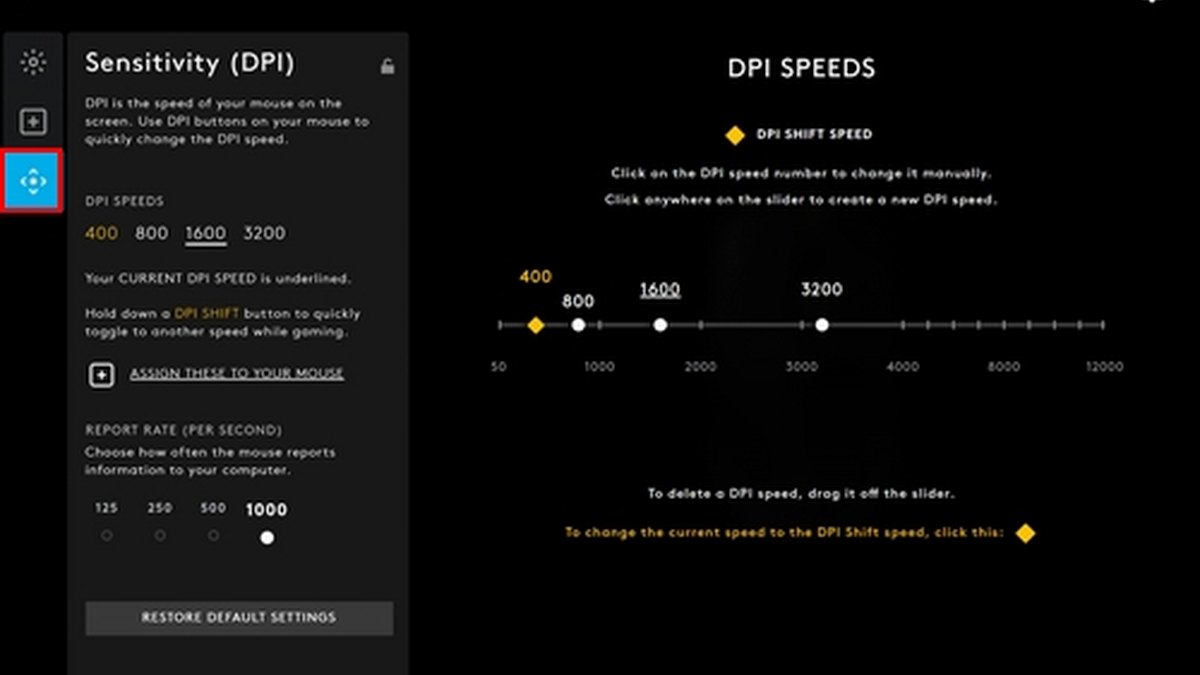
Open G HUB, click your mouse, and go to the Sensitivity (DPI) tab. Your DPI steps appear as numbers, and the one you are currently using is underlined, so in the screen above the current DPI is 1600.
You can keep up to five steps; drag a dot off the slider to delete it, or click an empty spot to add one. The DPI Shift speed, which only applies while you hold the shift button, is shown separately. Watch out for profiles.
G HUB can store a different DPI per profile, so the value you see on the desktop profile may not be the one your game uses. If you turned on automatic game profiles, open that game's profile and check again.
The screenshot above comes from Logitech's support article, so the current version may look slightly different.
Razer Synapse 4: select the mouse and look at sensitivity stages
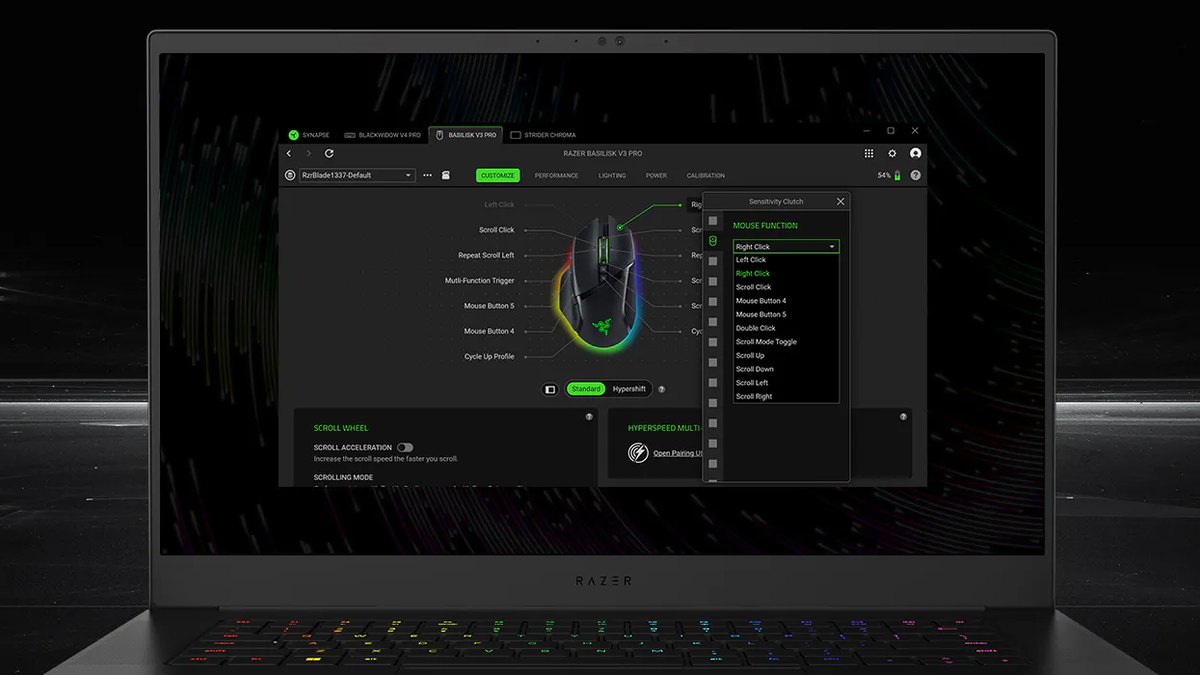
In Razer Synapse 4, pick your mouse from the device tabs at the top and its settings open. The official screenshots show CUSTOMIZE, PERFORMANCE, LIGHTING, POWER and CALIBRATION tabs, so look for the sensitivity (DPI) stages on the performance side first.
Tab names can shift between versions, so just look for the item called Sensitivity or DPI. The Viper V4 Pro and DeathAdder V4 Pro let you set DPI in 1 DPI increments, and both support Sensitivity Matcher, which carries the DPI of your old mouse over to the new one.
If you are switching brands, that is the quickest way to keep your old feel. The last DPI stages you saved are written to the onboard profile, so the mouse keeps them on another PC too.
For SteelSeries mice, open SteelSeries GG and go to Engine to see CPI steps; CPI is simply SteelSeries' word for DPI. Most other brands also have a Sensitivity or DPI page in their own app, so look up the model name on the label under your mouse and grab the matching software.
No software: DPI buttons and factory defaults by model
| Mouse | DPI button | How to see current DPI | Factory DPI steps (default) |
|---|---|---|---|
| Logitech G305 LIGHTSPEED (G304 in Asia) | Yes, behind the wheel | Press it and the light color changes | 400·800·1600·3200 (800) |
| Logitech G PRO X SUPERLIGHT 2 | None | Only in G HUB | Check in G HUB |
| Razer Viper V4 Pro | Yes, on the bottom | Synapse, or set the dongle LEDs to show DPI stage | 400·800·1600·3200·6400 (1600) |
| Razer DeathAdder V4 Pro | Yes, on the bottom | Synapse, or set the dongle LEDs to show DPI stage | 400·800·1600·3200·6400 (1600) |
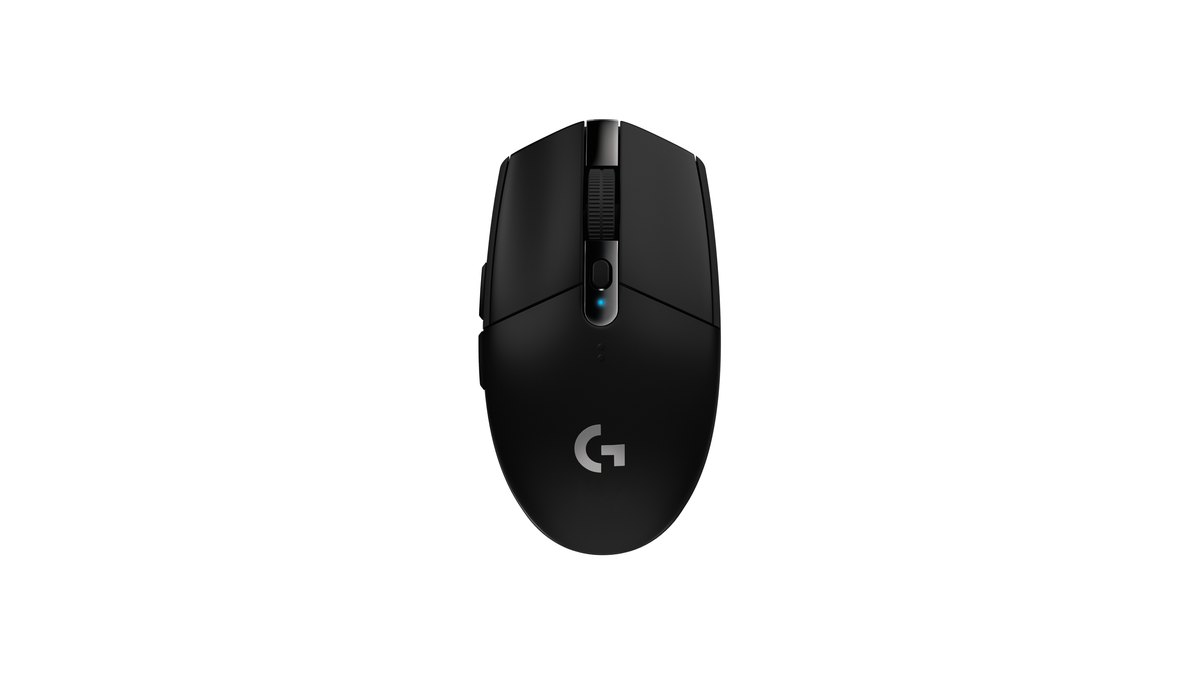
The Logitech G305 is the classic mouse you can read without any software.
Each press of the small button behind the wheel moves to the next step, and the light changes color: yellow is 400, white is 800, orange is 1600, magenta is 3200, and a fifth blue step at 6400 only appears if you enable it in G HUB. The factory default is 800, so a fresh G305 should show white.
It is the same mouse sold as the G304 in Korea, Japan, Taiwan, China and Vietnam, and it stores one profile onboard. Your palm or a finger can bump that button mid game, so if your aim suddenly feels off, check the light color before anything else.
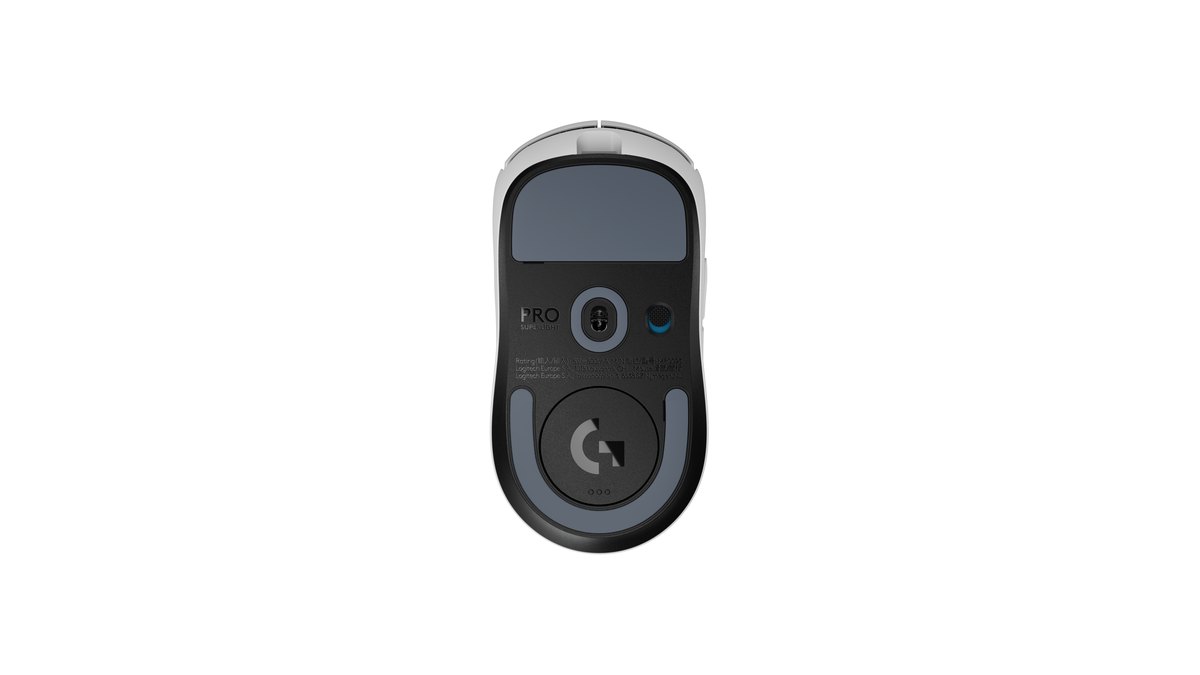
The Logitech G PRO X SUPERLIGHT 2 has no DPI button at all. It has five buttons (left, right, wheel, forward, back) plus a power switch on the bottom, and the manual tells you to set DPI and polling rate in G HUB. So on this mouse you need to open G HUB at least once to know your exact DPI.
Logitech's documentation does not list a factory DPI value, so do not assume one; check the underlined value on the Sensitivity (DPI) screen. After changing it, check the same screen again to make sure the underline has moved to the value you want.
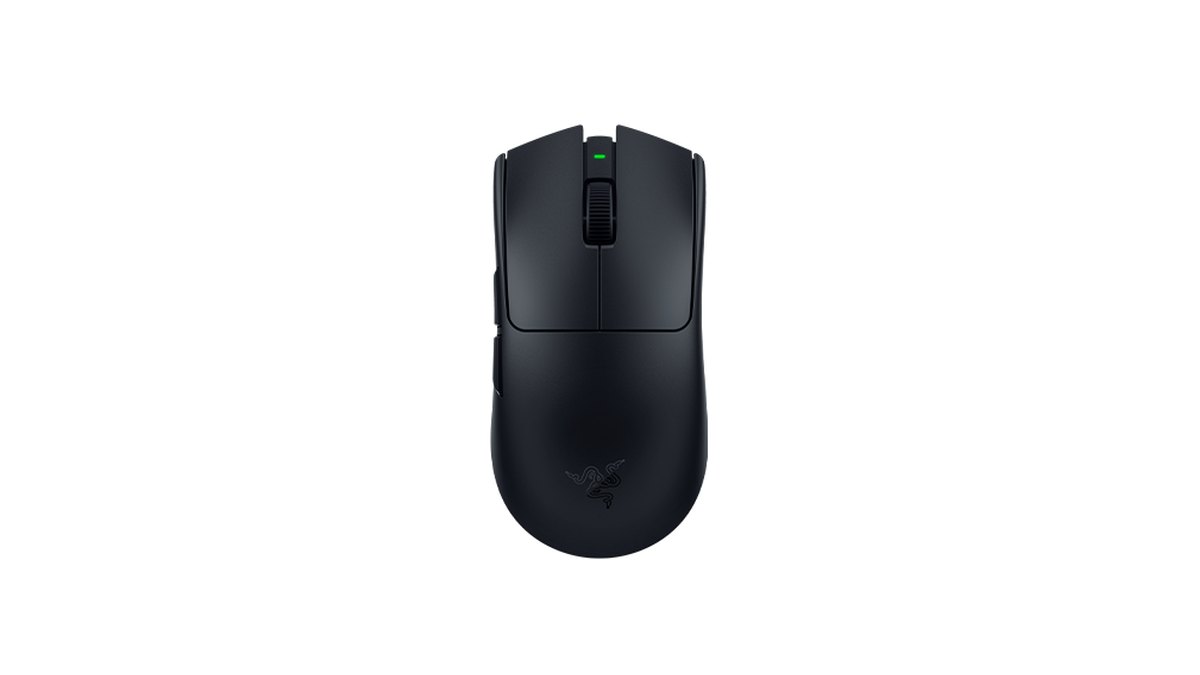
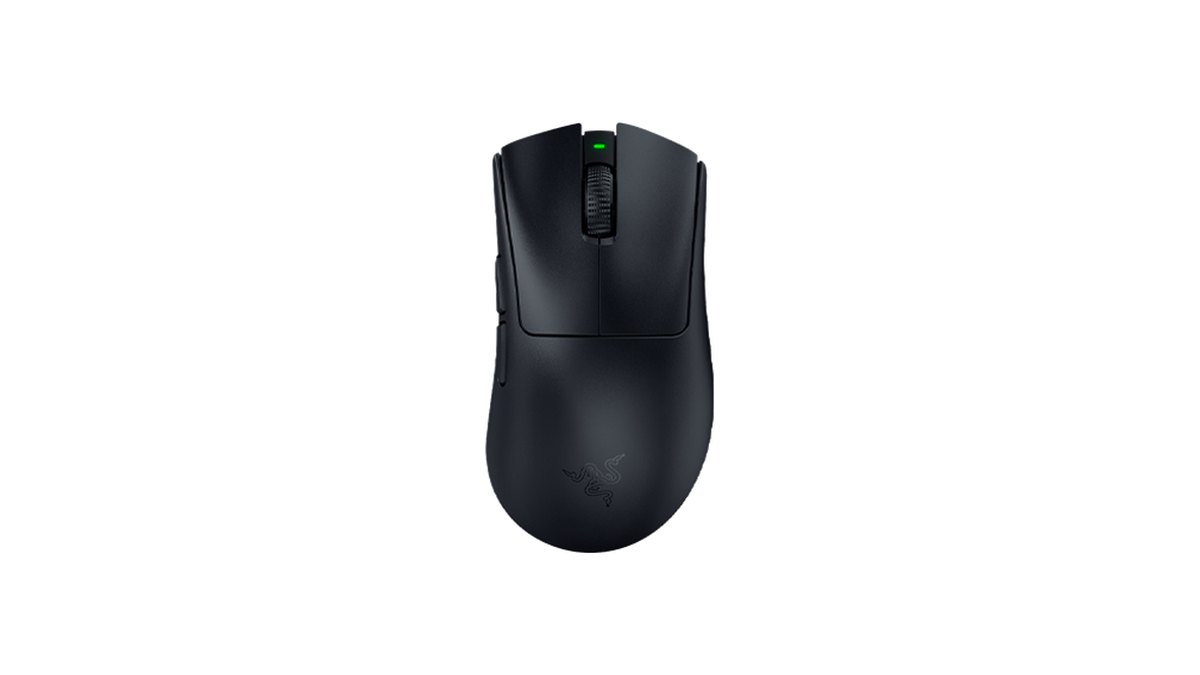
The Razer Viper V4 Pro and DeathAdder V4 Pro work the same way. Press and release the button on the bottom to cycle DPI stages; hold it to switch the mouse on or off. Factory stages are 400, 800, 1600, 3200 and 6400, with 1600 as the default.
That is why a brand new Razer mouse feels twice as fast if you assume it is at 800. You can drop to 800 with the bottom button, and if you want to see which stage you are on at a glance, set the three LEDs on the wireless dongle to show the DPI stage in Synapse.
By default they show battery, connection and polling rate, but once switched you can glance at the current stage even mid game.
Prices (as of November 10, 2026)
| Mouse | Launch price (MSRP) | Typical street price |
|---|---|---|
| Logitech G305 LIGHTSPEED (G304 in Asia) | $59.99 | About $40 to $60 |
| Logitech G PRO X SUPERLIGHT 2 | $159.99 | About $130 to $160 |
| Razer Viper V4 Pro | $159.99 | About $160 |
| Razer DeathAdder V4 Pro | $169.99 | About $150 to $180 |
These are US prices. Retail sales come and go often, and the cheapest listings tend to be short promotions, so check the current price and warranty at the store before you buy. The way you check DPI does not change with price: a budget G305 and a flagship Razer follow the same steps above.
No label and no software: measure DPI with a ruler and Paint
- 1Reset Windows mouse settingsGo to Settings → Bluetooth & devices → Mouse, set Mouse pointer speed to the middle (the default, 10), and turn off Enhance pointer precision. With that option on, fast and slow movements cover different distances and your result will be off.
- 2Set up Paint and a rulerOpen Paint full screen and place a ruler next to your mouse pad. Put the cursor near the left edge of the canvas and write down the horizontal pixel coordinate shown in the status bar at the bottom.
- 3Move exactly one or two inchesSlide the mouse along the ruler exactly 2 inches (5.08 cm) and note the new horizontal coordinate. If the cursor hits the screen edge, the number gets cut off, so if you suspect 1600 DPI or more, move just 1 inch.
- 4Divide pixels by inchesPixels moved divided by inches moved is your DPI. If you moved 1,600 px over 2 inches, 1,600 ÷ 2 = 800 DPI.
- 5Repeat three times and roundMeasure at least three times and average. If you get 780 or 830, read it as 800 and pick the nearest standard step: 400, 800, 1600 or 3200.
After you know it: lock 800 and convert your sensitivity
When you change DPI, change in game sensitivity too or your muscle memory breaks. There is one formula: new sens = old sens × old DPI ÷ new DPI. If you played VALORANT at Razer's default 1600 DPI with 0.2 sensitivity and drop to 800, raise sensitivity to 0.2 × 1600 ÷ 800 = 0.4.
If you were at 400 DPI and 1.6 sensitivity and move up to 800, drop to 0.8. Your eDPI stays the same, so the distance your hand remembers stays the same. If you just switched to Razer, Sensitivity Matcher in Synapse can carry your old mouse's feel over as well.
| Game | Suggested DPI | Why |
|---|---|---|
| VALORANT | 800 (1600 is common too) | Public pro list of 100: 57 at 800, 28 at 1600 |
| CS2 | 400 or 800 | Public pro list of 100: 51 at 800, 42 at 400 |
| PUBG | 400 or 800 | Public pro list of 64: 27 at 800, 26 at 400 |
| Apex Legends and Overwatch | 800 | A common baseline |
| Desktop and work | 800 to 1600 | Higher feels better on large, high resolution screens |
For VALORANT, use the VALORANT sensitivity test to check your new setting in cm/360. Apex players can continue with Apex sensitivity settings, and Overwatch players with Overwatch sensitivity settings. If you play several shooters, spend one minute in the browser sensitivity test after any change.
Six common mistakes
- Assuming a new Razer mouse is at 800: it ships at 1600, so everything feels twice as fast.
- Hitting the DPI button by accident: it sits behind the wheel on the G305 and underneath on the two Razer models, so a palm or the pad can change the stage.
- Different G HUB profiles per game: you check the desktop profile and miss the game profile's DPI. Automatic profiles fall back to defaults in games without settings.
- Leaving Enhance pointer precision on: both Logitech and Razer tell you to turn it off, and it also skews a ruler test.
- Thinking the settings disappear when you uninstall the app: the G305 and the two Razer models keep the last saved settings in onboard memory.
- Changing DPI but not in game sensitivity: your eDPI shifts and every flick lands somewhere else.
Why pointer precision and acceleration mess with aim is covered in mouse acceleration and LOD settings, and what to watch when changing polling rate is in 8000Hz polling rate settings. Logitech specifically says that if DPI seems to change after you switch report rate in G HUB, this Windows option is the first thing to turn off.
How to confirm the change worked
- Logitech: the underlined value on the G HUB Sensitivity (DPI) screen should read 800. On a G305, press the DPI button and look for white.
- Razer: set a dongle LED to show the DPI stage in Synapse and glance at it before you queue.
- In game: move the mouse 10 cm and compare how far you turn before and after. If you converted sensitivity correctly, it should be almost identical.
- Ruler test: run the Paint method once more and make sure you land near 800.
What users say: handy software versus heavy software
Opinions on maker software are split. Some owners like that G HUB or Synapse puts DPI changes and battery level on one screen, while complaints that the apps feel heavy or that switching profiles is a chore come up again and again.
That is why this guide also covers reading the button light, relying on factory defaults and measuring with a ruler. Another question that keeps coming up is whether DPI and polling rate are all you need to set.
For checking DPI, the order is simple: confirm the value, lock 800, convert sensitivity and turn off pointer precision.
Record before and after so you can compare
After a DPI or sensitivity change, comparing footage beats going by feel. Record a few matches before the change and a few after in the same mode, and you can see side by side whether you overshoot targets or whether your crosshair shakes less.
DOR is a free Windows app that detects supported games when you launch them, records the full match, and collects everything in My Clips. In VALORANT, kills are saved as automatic highlight clips with ace and clutch tags, and in PUBG, kills, knocks and deaths are saved too.
Trim the moments you want to compare in the app, then join the two videos in DOR Studio to see the difference back to back. The full process is in check gear upgrades with before and after recordings, and if you are thinking about a new mouse altogether, start with the best gaming mouse picks.