
The short answer: rapid trigger on WASD, 0.5 to 1.0mm actuation, 0.3 to 0.5mm sensitivity
The best rapid trigger settings for Valorant or CS2 do not start at the lowest value. Enable rapid trigger on your movement keys (WASD) only, set their actuation point to 0.5 to 1.0mm and set rapid trigger sensitivity, also called reset distance, to 0.3 to 0.5mm.
Keep every other key at 1.5 to 2.0mm, and push keys that hurt you when misfired, such as abilities, ultimate and jump, to 2.0mm or deeper.
These numbers sit between the lower values in Wooting's guides and the 1.0mm used in Razer's and Logitech's example profiles, right in the middle of what manufacturers suggest. Play a few matches, and only lower a value by 0.1mm when your stops feel clean and you see no accidental inputs.
- Movement (WASD): 0.5 to 1.0mm actuation, 0.3 to 0.5mm rapid trigger sensitivity
- Crouch: 0.5 to 1.0mm, add rapid trigger only if you spam crouch
- Ability keys 1.0 to 2.0mm, ultimate and jump 2.0mm or deeper
- Everything else: 1.5 to 2.0mm with rapid trigger off
- Continuous Rapid Trigger: off to begin with
- Separate gaming and typing profiles, with typing at around 2.0mm and rapid trigger off
Why these numbers: actuation point and rapid trigger sensitivity are two different settings
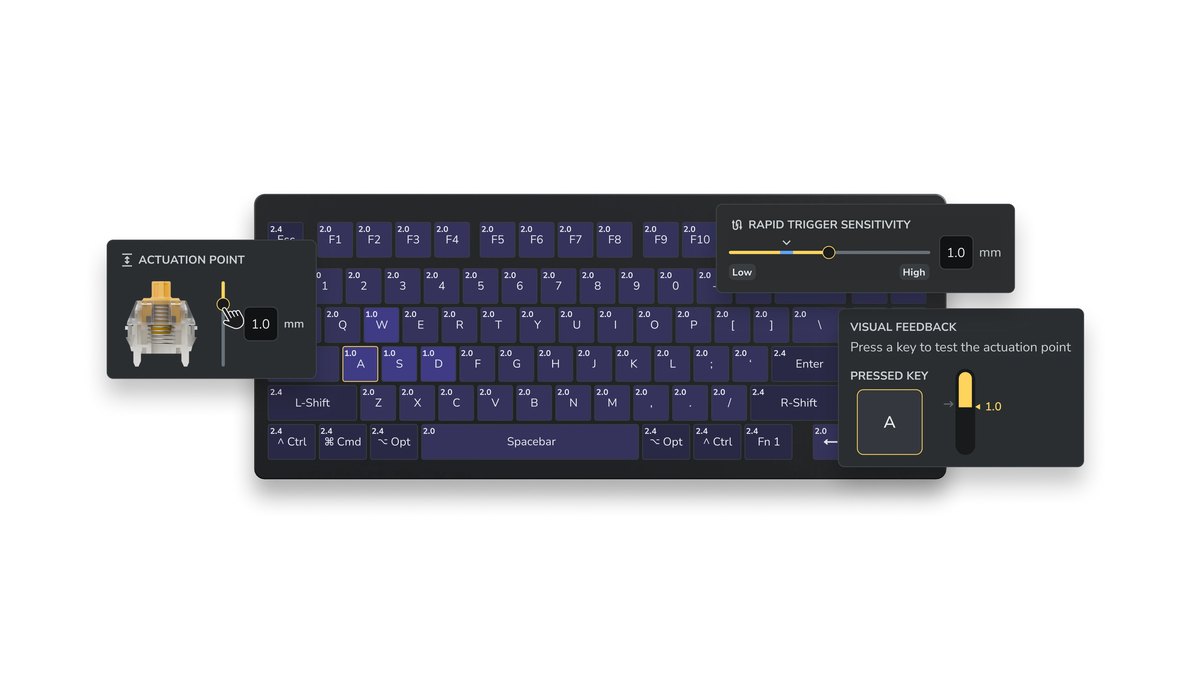
The actuation point decides how far, in millimeters, a key has to travel before it registers. A smaller number fires near the top of the stroke and a larger one makes you press deeper.
Rapid trigger sensitivity is the distance a pressed key has to rise before it counts as released, and how far it has to drop again before it counts as pressed. Here too, a smaller number means more sensitive.
A standard keyboard only releases a key after it passes a fixed reset point, while rapid trigger judges by direction: the moment your finger starts lifting, the key is released.
That is why it only exists on boards that read key depth continuously, such as Hall effect magnetic switches and analog optical switches. If you are still choosing a board, our gaming keyboard buying guide covers the basics.
Valorant and Counter-Strike 2 punish shooting while moving, so what matters is how quickly your character stops when you let go of a movement key. That is exactly where rapid trigger helps, which is why WASD is the place to start.
Go too low, though, and tiny finger jitter is enough to fire and reset the key over and over.
Corsair lists 0.3 to 3.6mm as the recommended range for best accuracy on its own Hall effect board, and Wooting notes that a very low sensitivity such as 0.15mm looks optimal but is not right for most players.
Player feedback points the same way: people who started at 0.1mm often report steadier stops after raising their values, although some players adapt to very low values and keep them. Going lower is something to try after the starting values feel natural.
| Setting | What it controls | How to tune it |
|---|---|---|
| Actuation point | How deep a key travels before it registers | Lower is faster but causes more misfires. Start movement keys at 0.5 to 1.0mm |
| Rapid trigger sensitivity (reset distance) | How far a key lifts to release and drops to press again | Lower is more sensitive. Start at 0.3 to 0.5mm and raise it if you see jitter |
| Separate press and release sensitivity | Different values for the downstroke and upstroke | Keep them equal at first. If keys re-press after release, make the press side less sensitive |
| Continuous Rapid Trigger | Keeps rapid trigger active above the actuation point until the key is fully released | Off at first. Try it only with deeper actuation points |
Setup order by keyboard: Wootility, Razer Synapse, G HUB and SteelSeries GG
- 1Create a new gaming profileLeave your default typing profile alone and make a new profile for games. On Razer, rapid trigger cannot be enabled on the factory default profile, so switch to a custom profile. On Logitech, onboard profile 2 is a reasonable base, but it has KEY PRIORITY on, so turn that off for CS2.
- 2Set every key to 1.5 to 2.0mmStart by setting the actuation point of all keys to 1.5 to 2.0mm. This is the baseline that keeps chat and menu typos down.
- 3Make only WASD shallowSelect W, A, S and D and lower their actuation point to 0.5 to 1.0mm using per-key settings or a key group selection.
- 4Rapid trigger on WASD onlyEnable rapid trigger on the same four keys and set sensitivity to 0.3 to 0.5mm. Leave Continuous Rapid Trigger off.
- 5Push costly keys deeperAbilities, ultimate, jump and the CS2 use key can ruin a round when misfired. Set them to 2.0mm or deeper and keep rapid trigger off on them.
- 6Test with the same drill and adjust in 0.1mm stepsPlay the same routine, such as a few deathmatches, and change only one value at a time by 0.1mm. If you notice movement you did not intend, roll back the last change.
Wooting 80HE+ and 60HE v2: the Performance tab in Wootility
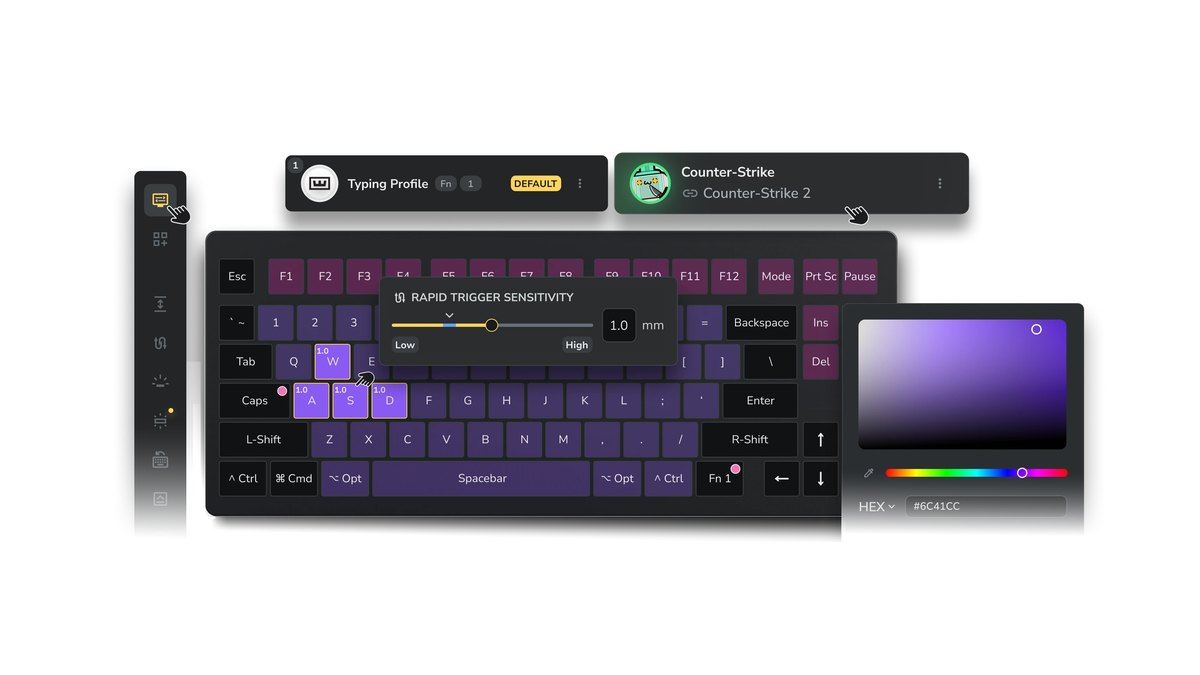
Wooting boards are configured in Wootility, available as a web app and a desktop app. Pick a profile, open the Performance tab, toggle Rapid Trigger on, use 'Set per-key rapid trigger' to select only WASD, then set the sensitivity slider.
The 80HE+ and 60HE v2 let you set the actuation point per key from 0.1 to 4.0mm in 0.1mm steps, and turning on Separate Up/Downstroke in the advanced settings lets you set press and release sensitivity independently. Continuous Rapid Trigger lives in the same advanced settings. With up to four onboard profiles, it is easy to keep a typing profile next to per game profiles.
Razer Huntsman V3 Pro Tenkeyless: Synapse or FN shortcuts
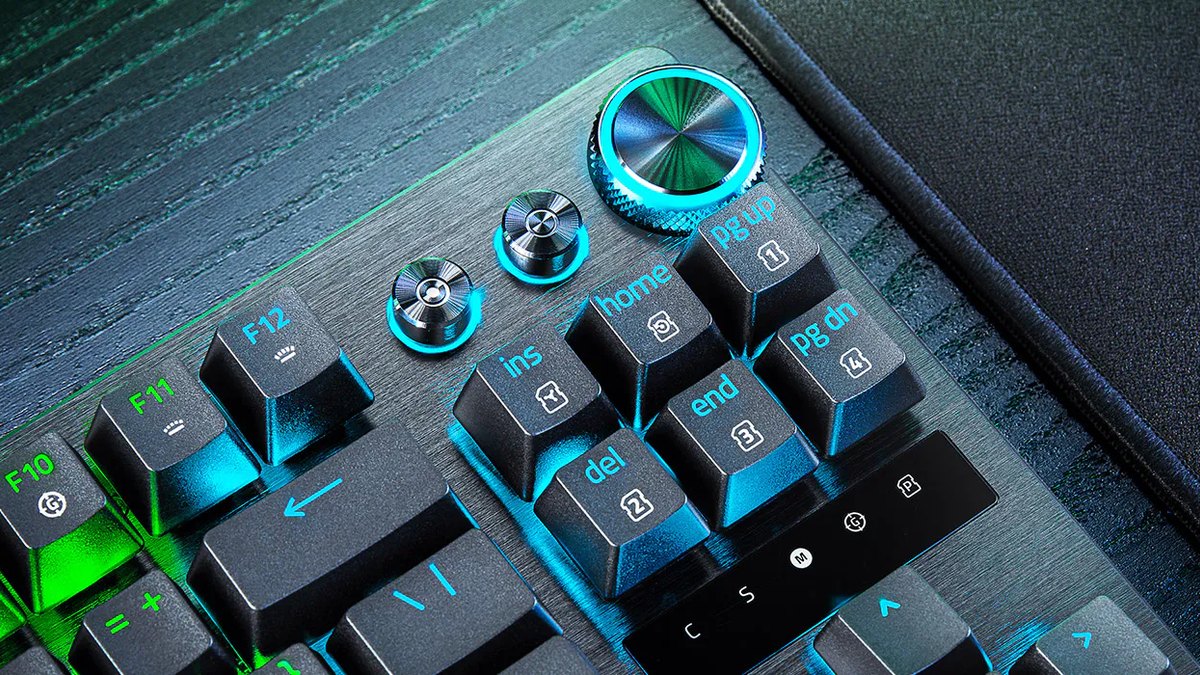
In Razer Synapse, the Actuation tab handles per-key actuation and rapid trigger. You can also do it on the keyboard itself. FN+Tab enters actuation adjustment mode: press a key to see its current height, change it with the dial or arrow keys, then press Esc to save.
FN+Caps Lock enters rapid trigger mode, where Caps Lock toggles it and the dial sets sensitivity. The actuation range is 0.1 to 4.0mm. The catch is that the factory default profile, shown with a green light, is locked to 2.0mm with rapid trigger off.
Switch to a custom profile and rapid trigger becomes available. For how it stacks up against Wooting, see our Wooting 80HE+ vs Huntsman V3 Pro TKL comparison.
Logitech G PRO X2 RAPID: adjust on the OLED with the roller
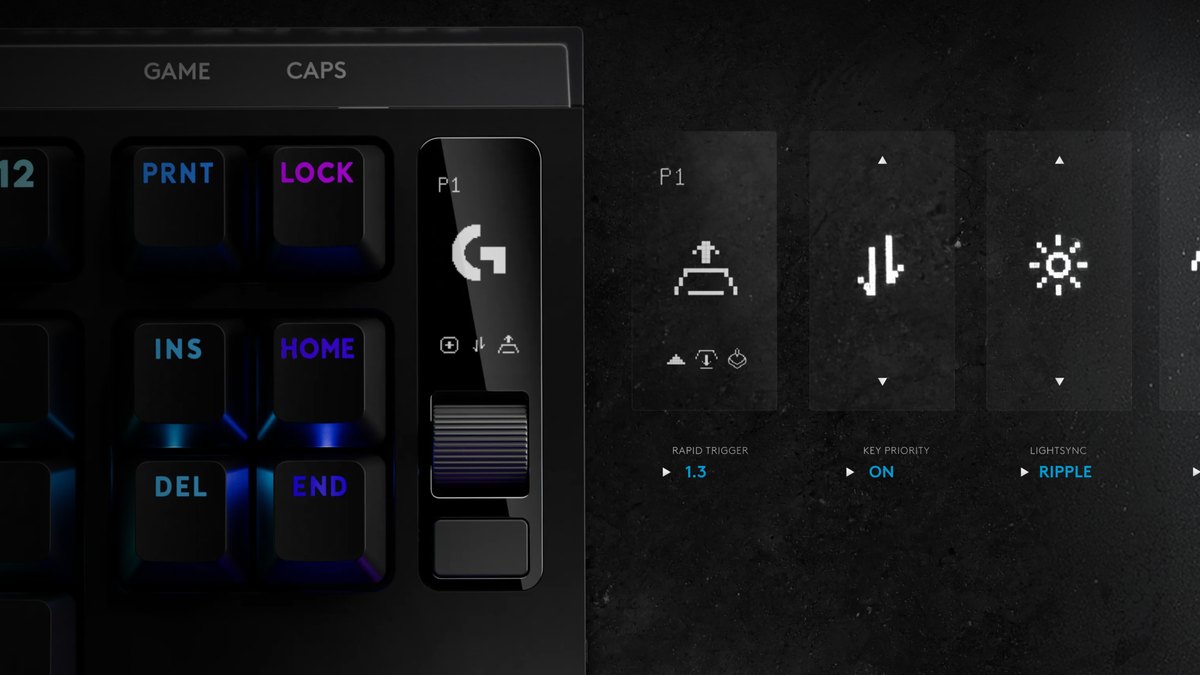
The PRO X2 RAPID puts an OLED screen and a navigation roller in the top right corner. Press the Menu button, choose ACTUATION POINT or RAPID TRIGGER, pick SELECT (a group of keys), LIST (key by key) or ALL, turn the roller to set the value and click the roller to apply.
Actuation adjusts from 0.1 to 4mm in 0.05mm steps, and G HUB adds deeper options and profile management.
Onboard profile 2 (FN+2) sets all keys to 1.00mm with rapid trigger at 0.5mm, which is close to our starting values, but it also has KEY PRIORITY (SOCD) turned on, so switch that off before you queue CS2. Our full verdict on the board is in the PRO X2 RAPID review.
SteelSeries Apex Pro TKL Gen 3: GG and onboard toggles
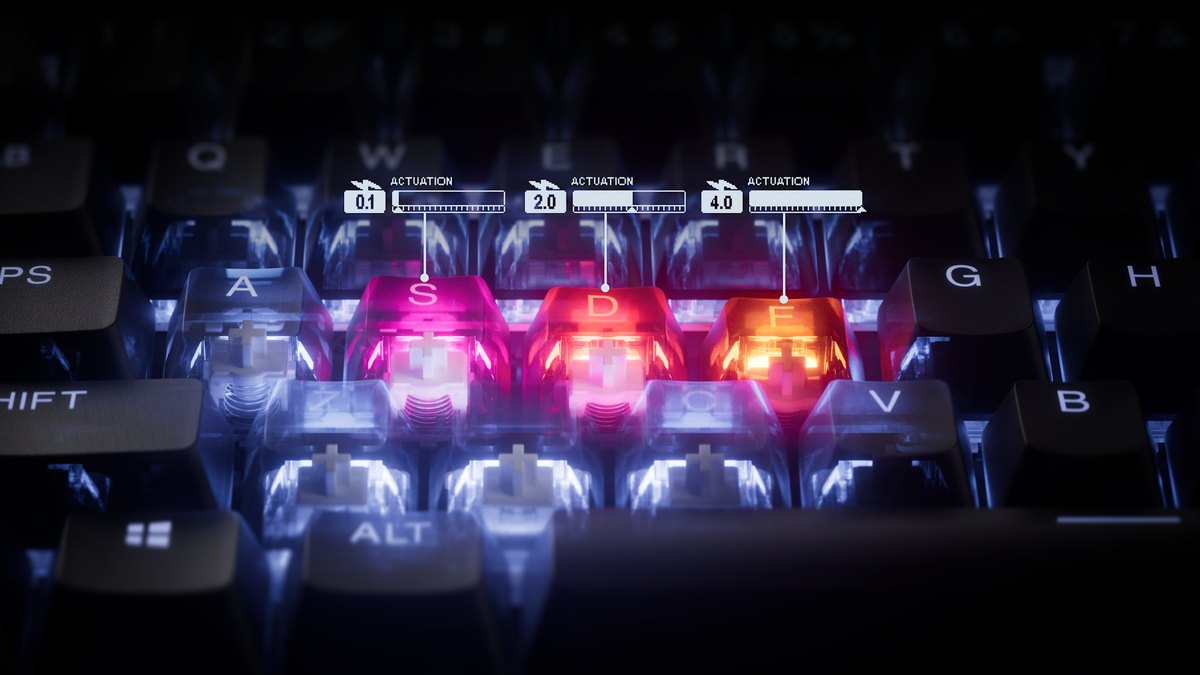
Per-key actuation is set in SteelSeries GG (Engine), and on the keyboard the SteelSeries key plus T toggles rapid trigger. From the OLED menu you can also hold the media button, enter Actuation and click the wheel to toggle it.
When rapid trigger is on, the 1 to 0 number row turns magenta and a lightning icon appears on the OLED. The 0.1 to 4.0mm actuation range applies to the 61 keys with OmniPoint 3.0 switches, while the F row, arrow keys and other remaining keys use standard switches.
The Triple Threat preset in GG QuickSet enables rapid trigger, Rapid Tap (SOCD) and Protection Mode together, so turn Rapid Tap off for CS2.
| Keyboard | Actuation range and step | Where to enable rapid trigger | Check first |
|---|---|---|---|
| Wooting 80HE+ | 0.1 to 4.0mm, 0.1mm steps, per key | Wootility Performance tab | Split press and release and Continuous Rapid Trigger are in advanced settings |
| Wooting 60HE v2 | 0.1 to 4.0mm, 0.1mm steps, per key | Wootility Performance tab | Save game profiles to the four onboard slots |
| Razer Huntsman V3 Pro TKL | 0.1 to 4.0mm | Synapse Actuation tab, FN+Caps Lock | Rapid trigger cannot be enabled on the factory default profile |
| Logitech G PRO X2 RAPID | 0.1 to 4mm, 0.05mm steps | OLED menu RAPID TRIGGER, G HUB | Onboard profile 2 has KEY PRIORITY on |
| SteelSeries Apex Pro TKL Gen 3 | 0.1 to 4.0mm, 61 OmniPoint keys | SteelSeries key + T, OLED, GG | The Triple Threat preset also enables Rapid Tap |
Prices as of November 10, 2026
| Keyboard | List price (MSRP) | Street price range |
|---|---|---|
| Wooting 80HE+ | $199.99 (ABS) or $289.99 (zinc) | Sold direct at list price |
| Wooting 60HE v2 | $179.99 (plastic) or $239.99 (aluminium) | Check the seller |
| Razer Huntsman V3 Pro TKL | $219.99 ($229.99 white) | Check the seller |
| Logitech G PRO X2 RAPID | $229.99 | Check the seller |
| SteelSeries Apex Pro TKL Gen 3 | $219.99 at launch | About $239.99 on the official store |
Prices move with sales and stock, so check the seller before you buy. Every keyboard in this table uses the same two settings, so the starting values in this guide apply whichever one you pick. Razer sells an 8KHz version under almost the same name at its own price, so check the exact model.
Rapid trigger starting values by game
The table below collects manufacturer guides and example profiles into starting values per game. For Valorant, Wooting's guide goes as low as 0.2 to 0.5mm actuation and 0.2 to 0.4mm sensitivity on WASD, but if you are new to rapid trigger it is safer to start one notch higher.
For CS2, the same company's guide uses 0.7mm actuation and 0.5mm sensitivity as its baseline and tells you not to put rapid trigger on the use key you hold to defuse. Whether Snap Tap style features are allowed in CS2 is covered in our Snap Tap and rapid trigger rules guide, and the wider picture of what pros use is in CS2 pro settings and gear.
| Game | Movement actuation / sensitivity | Other keys | Notes |
|---|---|---|---|
| Valorant | 0.5 to 1.0mm / 0.3 to 0.5mm, down to 0.2mm once adapted | Crouch 0.5 to 1.0mm, abilities 1.0 to 2.0mm, ultimate and jump 2.0mm or deeper | Rapid trigger on WASD only, add crouch if you spam it |
| CS2 | 0.7mm / 0.5mm, down to 0.4mm then 0.2mm once adapted | Everything else 1.5mm, use key with rapid trigger off | SOCD features off, rapid trigger only |
| Apex Legends (reference) | 0.5 to 1.0mm / 0.3 to 0.5mm | Deeper jump and crouch if you misfire them | Little game specific guidance, so start from the Valorant values |
| Overwatch and Fortnite (reference) | Same values on movement keys only | Ability and build keys 1.5 to 2.0mm | No official recommendations, so only the movement key rule applies |
| League of Legends and other MOBAs | Rapid trigger off, 1.5 to 2.0mm | Ability keys around 2.0mm | Misfires cost you, so go deeper |
| Rhythm games | Rapid trigger on the keys you use, shallow | Defaults elsewhere | Manufacturers highlight the benefit for fast repeated taps |
| Chat and typing | Around 2.0mm, rapid trigger off | Same | Keep it apart from gaming profiles |
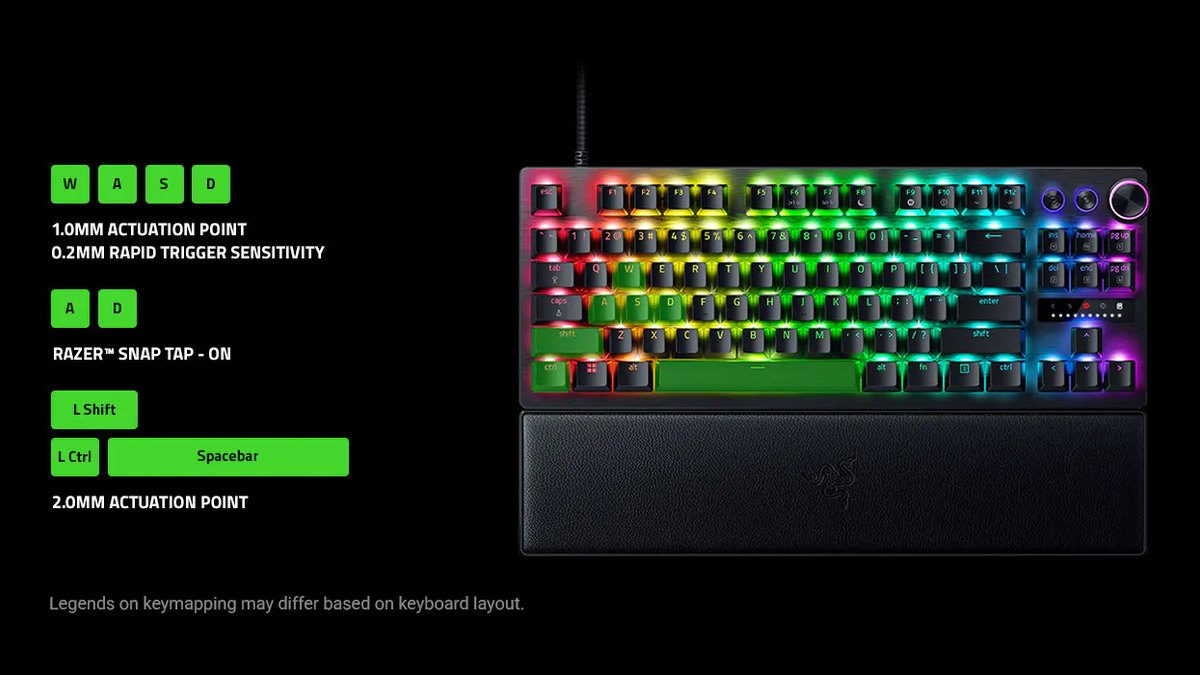
The official game profile example that Razer shows on its product page follows the same logic: movement keys at 1.0mm actuation with 0.2mm rapid trigger sensitivity, and Left Shift, Left Ctrl and Spacebar pushed deeper to 2.0mm.
That example was built for a different game and has Snap Tap enabled on A and D, so do not copy it into CS2 as is. Borrow the idea of giving each key its own value instead.
Seven common rapid trigger mistakes
- Setting every key to 0.1mm actuation and 0.1mm sensitivity on day one. Small finger jitter fires and resets keys repeatedly, which makes your stops less stable, not more.
- Turning rapid trigger on for every key. Crouch, jump and defuse can break off or fire again when you did not mean them to.
- Assuming a Razer board is faulty because rapid trigger will not turn on in the factory default profile (green light). Switch to a custom profile.
- Queuing CS2 on a preset that also enables SOCD, such as Logitech onboard profile 2 or SteelSeries Triple Threat.
- Setting the actuation point shallower than the rapid trigger sensitivity, so rapid trigger barely does anything.
- Dropping counter-strafe practice because rapid trigger is on. Wooting's own CS2 guide says tapping the opposite key still helps.
- Leaving analog (controller) input enabled while you play. Some games may read the keyboard as a gamepad, so turn it off if you do not use it.
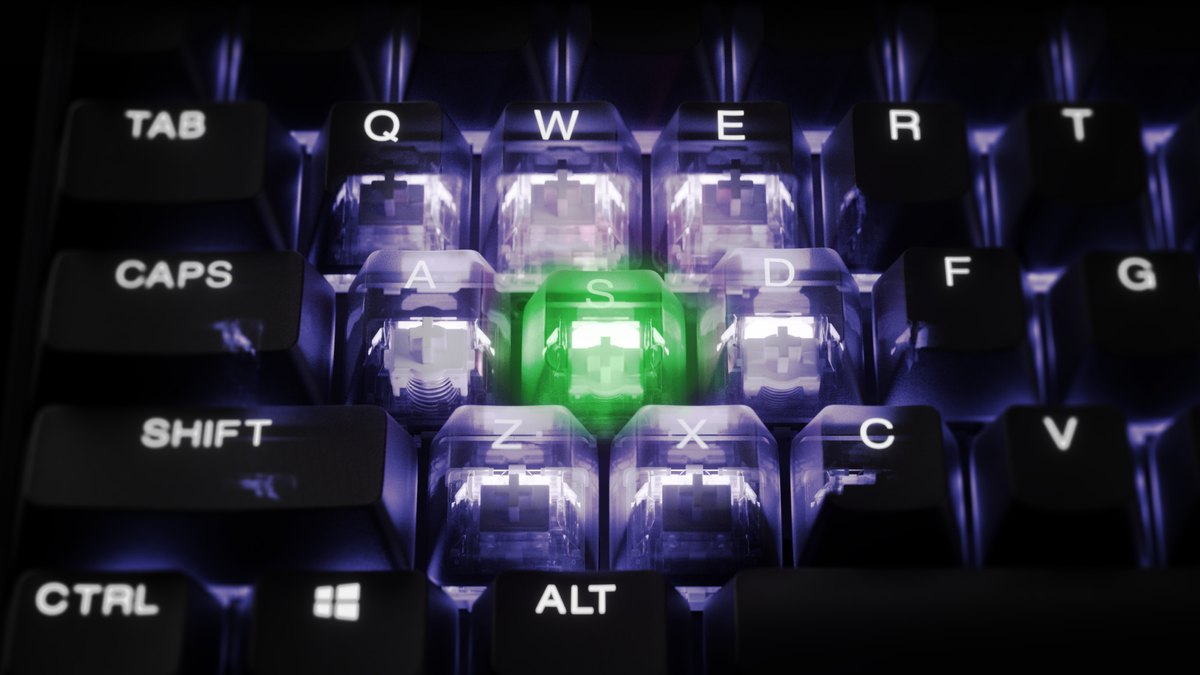
If you worry about hitting neighboring keys with a shallow actuation point, manufacturer helper features are an option. SteelSeries Protection Mode automatically lowers the sensitivity of keys around the one you are pressing to cut down on typos and misfires. On boards without anything like it, the simplest fix is to set only the keys you keep misfiring a little deeper.
How to check your settings after a change
Start with the keyboard's own feedback to confirm the values took. Wootility shows how far each key is pressed and where it actuates as you type, and on Razer you can press a key in FN+Tab mode to see its actuation height.
SteelSeries shows the number row color and a lightning icon on the OLED, and Logitech shows the profile number and menu values on its OLED home screen. Then move to real gameplay.
You want to see when your first shot lands after a strafe peek, and whether your character really stopped at the moment you think it did. That is hard to judge by feel alone.
Recording with an on screen key input overlay lets you line up the moment you released the key with the moment your character stopped. Our guide to showing key inputs in gameplay videos explains how.
Record before and after with DOR to compare your settings
Comparing is much easier if you record a few deathmatches on your current settings before touching anything. DOR is a free Windows app that detects Valorant or CS2 when you launch it, records the full match and collects the recordings in My Clips.
In Valorant it cuts kills into automatic clips with Ace and Clutch tags, and in CS2 it collects kill, death and assist moments as clips.
After changing a setting, record the same mode for the same number of matches, trim the parts you want to compare in the app, then combine the before and after footage in DOR Studio and add the values you changed as text so the difference sits on one screen.
If you want to capture practice range sessions, use screen recording (default shortcut F7). Our before and after recording guide for gear upgrades walks through the comparison, and how to record Valorant gameplay covers the recording setup.