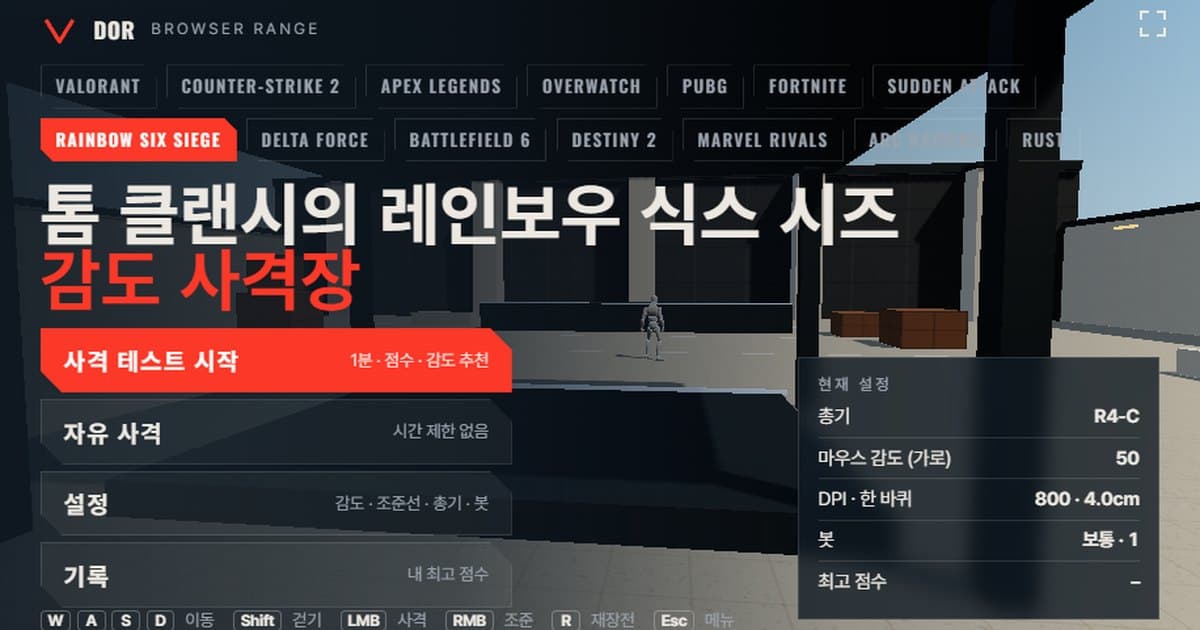
Rainbow Six Siege sensitivity is set in Options > Controls > Mouse with separate Mouse Sensitivity Horizontal and Vertical sliders that take whole numbers from 1 to 100, and Ubisoft's own article gives the default as 50. At 800 DPI that default is a fast turn of about 4.0 cm per 360°, so it is worth checking your number on the range at the top of this page before you change it. The range is a browser practice room that mimics the mouse turn rate and field of view of Tom Clancy's Rainbow Six Siege. Just like the in-game options, you enter the sensitivity slider value (1–100) and your DPI, pick a weapon and run a 1-minute test. You get a score, accuracy, headshot rate and the average time from a target spawning to its kill, and the range counts whether you overshot or stopped short of targets to suggest whether to raise or lower your sensitivity. There is nothing to install; it opens right away in Chrome or Edge on PC as long as the browser supports mouse lock (pointer lock) and WebGL2. Mobile browsers and in-app browsers block mouse lock, so it does not work there.
In Siege you spend a long time holding angles and waiting, and a head hit kills in one shot with almost every firearm (per the community wiki; Caveira's Luison pistol is the exception). That is why fine adjustment over a narrow area often matters more than wide flicks. So on this range, we recommend looking at headshot rate and the overshoot/undershoot tally before the kill count. Ranges for other games are listed in the browser sensitivity range overview.
What matches Rainbow Six Siege and what differs
The range imitates Siege with the values in the table below. The turn rate is the figure that sensitivity converter sites share, and the FOV is the lower end of the official range used as is. Movement speed and bot health are approximations because little public data exists.
| Item | Tom Clancy's Rainbow Six Siege | Range | Note |
|---|---|---|---|
| Turn rate (°/count) | Horizontal sensitivity × 0.00572957795 (at the default ini multiplier 0.02) | Same formula | The formula structure is official Ubisoft; the angle per step is a community measurement |
| Field of view | Vertical 60–90 slider; 60 at 16:9 ≈ 91.5° horizontal | Fixed 91.5° horizontal (vertical 60) | Vertical 90 ≈ 121.3° horizontal, which looks wider than the range |
| Movement speed | Only 2.34 m/s while aiming is official; hip-fire speed is a community estimate of about 3.75–5 m/s | Run 5.5 m/s · walk 3.03 m/s | The range is slightly faster |
| Bot health/armor | Operators have 100/110/125 HP with no armor damage reduction (community wiki) | 100 HP, heavy option 150 | A headshot is an instant kill on both |
| Weapon list | Fixed loadout per operator | P226 Mk 25, D-50, MP5, R4-C, L85A2, CAMRS, CSRX 300 | Fire rate, magazine and damage approximate community wiki values |
The turn rate row is the most important one. Siege's sensitivity slider is linear, so going from 10 to 20 exactly doubles the turn rate, and the range scales in the same proportion. That means the number the range gives you can go straight into the game options. One caveat: if you have ever changed MouseSensitivityMultiplierUnit in GameSettings.ini from its default of 0.02, the meaning of the slider value changes, so read the sensitivity system section below first.
How to run the 1-minute test
- 1Enter sensitivity and DPIIn Settings > General, set the horizontal mouse sensitivity slider to the same number you use in the game and enter your mouse DPI. DPI does not affect turning; it is only used for the eDPI and cm/360 readouts. The actual turn uses the raw counts your mouse sends.
- 2Pick a weaponIn the Weapons tab, choose a gun that fits what you want to practice. If this is your first run, a 1x R4-C or MP5 makes the result easiest to interpret. In the Bots tab you can also set bot speed (Easy, Normal, Hard), the number of targets at once, and whether bots strafe.
- 3Go fullscreen, then startPress the Fullscreen button in the menu, then Start test. The mouse locks and a 60-second countdown begins. Windowed mode works too, but fullscreen is recommended so the cursor never leaves the screen.
- 4Shoot for 1 minuteAim and kill the bots as they appear, just as you would in a match. Pressing ESC pauses the round and brings the cursor back; press Resume to continue. Because of a browser restriction, mouse lock can be refused for 1–2 seconds right after ESC, so wait a moment and press again.
- 5Read the resultOn the Round result screen, check the score, accuracy, headshot rate, Avg kill, spawn → first shot average, overshoot/undershoot tally and the sensitivity suggestion. Press Retry with suggested sens to apply the suggested value immediately.
- 6Repeat 2–3 times the same dayA single run swings with your form. Use Retry same setup to run the same settings 2–3 times and only change your sensitivity when the suggestions point the same way, then compare best scores per setup in the Records tab.
Settings are split into five tabs, General, Crosshair, Weapons, Bots and Audio & Video, and are saved in this browser. In the Crosshair tab you can match color, outline, center dot and inner line length, thickness and offset to your Siege reticle, and turning off shadows and bloom in Audio & Video keeps the frame rate steady on low-end laptops. If the crosshair elements are unfamiliar, the explanations in the VALORANT crosshair guide apply here as well.
How to read the result screen
- Accuracy: the share of shots fired that hit a bot. Rounds tap-fired with a pistol or marksman rifle normally score higher than rounds sprayed at the body with an automatic weapon, so compare records from the same weapon.
- Headshot rate: the share of kills that ended with a headshot. In Siege a head hit is the kill, so this number tracks real match performance most closely.
- Avg kill: the average time from a bot appearing to it going down. The better the sensitivity fits you, the shorter it gets.
- Spawn → first shot average: your reaction time from noticing a bot to the first shot. If this stays flat while kill time grows, the aim correction is what is taking time.
- Shots per kill: rounds spent on one kill. With small magazines such as the R4-C (25) or D-50 (7), this maps directly to how often you reload.
- Overshoot / undershoot: for each tracking segment, the range classifies whether your aim went past the target (overshoot) or stopped short (undershoot). If the two add up to fewer than 5, the sample is considered too small and no suggestion is made; if one side exceeds 60%, the range suggests a value adjusted 10% in that direction. Because Siege's slider is an integer, it moves at least one step.
- Best (same setup): your all-time best score with the same game, weapon and sensitivity combination. Changing the setup starts a separate record.
Rainbow Six Siege sensitivity settings: the 1–100 slider and the ini multiplier
Siege's mouse sensitivity is set in Options > Controls > Mouse, with separate Horizontal and Vertical sliders from 1 to 100 in whole numbers. According to the FOV and Input Sensitivity article Ubisoft published in 2019, the default is 50, and hip-fire turning is computed as 'Input Yaw × (MouseSensitivityMultiplierUnit × horizontal sensitivity)'. MouseSensitivityMultiplierUnit is a multiplier in the [INPUT] section of GameSettings.ini under Documents > My Games > Rainbow Six - Siege > your account ID folder; it defaults to 0.02, and lowering it to 0.01 halves the speed of every slider value while doubling the fineness of adjustment. The official documents never say how many degrees one slider step is; the value converter sites share, 1 step = 0.0001 rad = 0.00572957795° per count, is a community measurement.
This is the formula when MouseSensitivityMultiplierUnit is at its default 0.02. Since 2.54 × 360 = 914.4, computing 914.4 ÷ (DPI × sensitivity × 0.00572957795) gives the same result. If you changed the multiplier, replace sensitivity with sensitivity × (multiplier ÷ 0.02). The turn coefficient 0.00572957795 is the value shared by community converter sites.
Converting a few values at 800 DPI gives the following. The DPI · 360° field in the range menu shows the same calculation.
| Horizontal sensitivity (800 DPI) | eDPI | Distance per 360° (cm/360) | Note |
|---|---|---|---|
| 5 | 4,000 | about 39.9 cm | Very slow; same as sensitivity 10 at 400 DPI |
| 10 | 8,000 | about 19.9 cm | Roughly CS2 2.6 on community conversion tables |
| 20 | 16,000 | about 10.0 cm | Fast, flick-oriented |
To compare with other games, the ratios converter sites use are handy. Multiply Siege's horizontal sensitivity by 0.2604 for CS2 and Apex Legends, by 0.0819 for VALORANT, and by 0.868 for Overwatch 2 (all per community converter sites). If the math is a hassle, use the sensitivity and DPI converter, or shoot one more round at the same cm/360 on the other game's range (CS2 sensitivity range, VALORANT sensitivity range) to feel the difference.
Per-scope ADS sensitivity and the range's zoom multiplier
Siege keeps a separate aim sensitivity for each scope magnification. In Options > Controls > Mouse, the aiming (ADS) section offers Standard, where one slider applies to every sight, and Advanced, which exposes a slider per magnification. According to Ubisoft's Y5S3 ADS sensitivity guide, new accounts start at 50 for every magnification, and 50 is the neutral value where hip-fire and aiming flow into each other naturally. The magnifications the Sights & Scopes dev blog listed at the time of Y5S3 were 1.0x, 1.5x, 2.0x, 2.5x and 3.0x; the claim that after the optics rework the sliders are now 1.0x, 2.5x, 3.0x, 3.5x, 5x and 12x comes from the community wiki. The ini still contains keys from ADSMouseSensitivity1x through 12x plus ADSMouseMultiplierUnit (default 0.02).
Since Y5S3, Siege's aim sensitivity keeps the on-screen cursor speed constant as magnification increases (Ubisoft calls it visuomotor gain). The figure that a 1.0x scope at ADS 50 turns at about 0.6 times the hip-fire rate comes from community calculators such as DPI Wizard; the official documents never state the ratio as a number. The range computes the aiming turn rate as 'hip-fire turn rate × scoped sensitivity multiplier ÷ weapon zoom', so setting the Scoped sensitivity multiplier in the General tab (range default 1.0) to 0.6 lands close to Siege's default ADS 50, while 1.0 is closer if you run your 1.0x value up near 83. The 2.5x L85A2 and the 5x CSRX 300 slow down automatically by their zoom factor at the same multiplier value.
Field of view setting
FOV is set with the Field of View slider in Options > Display as a whole number from 60 to 90, measured vertically. The 60–90 range is in the Ubisoft article above; the PC default being 60 comes from community sources. Vertical 60 on a 16:9 monitor is about 91.5° horizontal, and the range uses that value. That most PC pros use 90 (about 121.3° horizontal) comes from community sources, so if you run 90 in the game, keep in mind the range looks a little narrower and on-screen movement feels larger at the same sensitivity. No public value exists for the FOV inside scopes.
Siege weapons in the range
The Weapons tab holds seven representative Siege guns. The numbers are close-range baseline values from the community wiki, and per Siege rules a head hit is a one-shot kill with all seven.
| Name | Fire rate (rpm) | Mag | Reload (s) | Head · body damage | ADS zoom |
|---|---|---|---|---|---|
| P226 Mk 25 | 550 | 15 | 1.8 | Instant kill · 50 | 1x |
| D-50 | 550 | 7 | 2.0 | Instant kill · 71 | 1x |
| MP5 | 800 | 30 | 2.2 | Instant kill · 27 | 1x |
| R4-C | 860 | 25 | 2.7 | Instant kill · 39 | 1x |
| L85A2 | 670 | 30 | 2.7 | Instant kill · 47 | 2.5x scope |
| CAMRS | 450 | 20 | 2.6 | Instant kill · 69 | 3x scope |
| CSRX 300 | 50 | 5 | 2.5 | Instant kill · 135 | 5x scope |
For one-tap practice, the P226 Mk 25 and D-50 fit well. Body shots need two or three rounds but the head takes one, so your headshot rate shows immediately. For spray and tracking, use the 860 rpm R4-C and the MP5 with Bot movement set to Strafing; shots per kill then reacts sensitively to sensitivity changes. For flicks and low-sensitivity checks, use the 5x CSRX 300 or the 3x CAMRS and watch how the spawn → first shot average moves as you change the scoped sensitivity multiplier. The feel of magnified-scope sensitivity follows the same principle described in the PUBG scope sensitivity calculator.
Limits of a browser range and how to compensate
- Raw input: the range requests raw input through pointer lock, but if the browser refuses, OS acceleration gets mixed in. If a notice appears on screen, turn off Enhance pointer precision in Windows and reopen the page. To compare under the same conditions as the game, test while that notice is not showing.
- Input timing: browsers batch mouse movement per frame, which reduces the benefit of 4000–8000 Hz polling mice. The total rotation is identical, but the fine jitter feel may differ, so treat results as relative comparisons.
- No recoil patterns: Siege's per-weapon recoil patterns are not reproduced; only spread during automatic fire is simplified. Practice recoil control in the in-game shooting range and focus here on first-shot and tracking accuracy.
- Accuracy while moving: you can toggle spread while walking, running and jumping, but details such as Siege's lean or the 2.34 m/s aiming movement speed (per the Y7S4 designer's notes) are not present.
- Fixed 16:9 FOV: the range offers only 91.5° horizontal (vertical 60). If you use a 21:9 monitor or vertical 90, remember the game shows a wider area, and compare sensitivity by the cm/360 number.
Because of these limits, range results should be read as 'the difference when only sensitivity changes under the same conditions' rather than as absolute scores. Do not change by more than 10% at a time, and after a change, play a few matches of angle holding and close-range fights to confirm it suits you.
After choosing a sensitivity, confirm it in real matches: DOR
Once the value from the range is in the game, the next step is recording real matches. When DOR recognizes Tom Clancy's Rainbow Six Siege, it records the match automatically, and a single hotkey saves a clip of any moment you want. Clips can be trimmed in the browser editor and shared as a dor.gg link. It is free and runs on Windows. Collect the fight clips from the day you changed sensitivity and you can see with your own eyes whether overshooting actually went down. Full usage details are on the Rainbow Six Siege recording page.
 #Rainbow Six Siege